New Employee Group
All permissions are set to "Deny" for new groups.
Navigate to Store Operations > Employees.
Click the Group Management button.

Click the New button on the bottom toolbar.
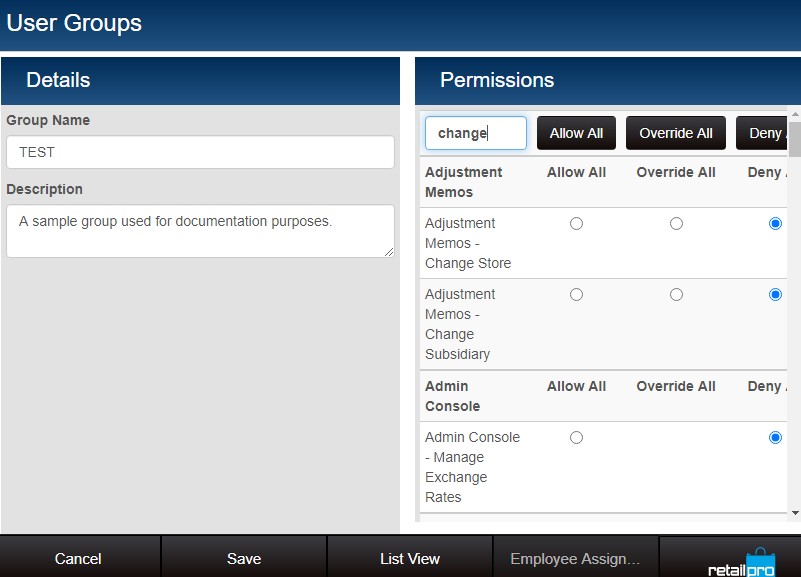
In the Details area, enter a Group Name. Group names are limited to eight letters so that the group names can replicate to RIL.
(Optional) Enter a Description that gives more detailed information about the group and its permissions.
In the Permissions area, select the individual permissions that will be allowed for group members. All permissions are set to "Deny" initially for new groups. You can search the list for individual permissions by typing all or part of the permission name in the text box. In the example below, the list is filtered to show only permissions with the word "change."
When finished assigning permissions for the group, save the changes. After the new group is saved, click the Edit button and assign employees.
To assign employees, click Employee Assignments.
Select the checkbox for each employee who will be a member of this group. (Use the All/None toggle button to select/clear all employees)

Click Save.