Jun 16, 2021 | Retail Pro Prism
How to Switch Between Custom Layouts in Retail Pro Prism
There are times when a user may want to switch between different custom layouts in Retail Pro Prism. Switching between layouts can be done through customizations with the help of RP Prism's Button Hooks Manager & browser window session variables. In this article, we will look at a sample customization where the layouts can be switched based on the logged in user.
How to create the customization to switch between layouts
1. To begin, create a JavaScript file ‘customButtonHooks' in the /WebClient/customizations/js folder. On the "before_event" of the New Transaction Button, check whether the logged in user is an Admin.
Set the custom session variable to True if the logged-in user is an Admin or False if the user is not an Admin. Below is the code snippet.

2. Create another file ‘switchLayout-controller.js' in the /WebClient/customizations/js folder. Check the custom flag (session variable) set in the above file and set the scope variable ($scope.enableSwitchLayout) that is assigned as the ng-show attribute value in the corresponding HTML file. Below is the code snippet.

3. Add reference to these files in the /WebClient/customizations.html file.

For this example, the layout set in the Admin Console is ‘Standard Shipping.' If the logged-in user is an Admin, the layout remains unchanged. Below is the screenshot of an Admin's view.

4. Create a new file ‘pos-transaction-partial.htm' in the /WebClient/customizations/views/default folder and copy the default html code of the same file name from the default RP Prism folder (/WebClient/views/default).
Add ng-controller, ng-show attributes to any of the divs you wish to show or hide. See the screenshot below for reference.

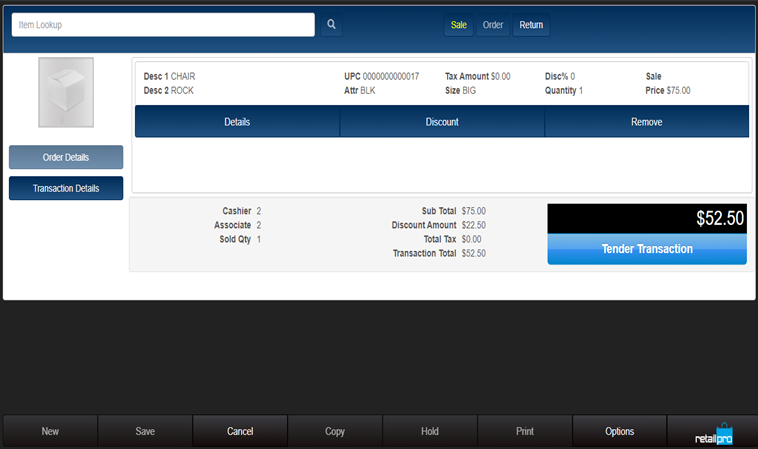
If the logged-in user is not an Admin, then customer-related functionalities like the top div remain hidden. Below is the screenshot of the non-admin (cashier) view. Notice that the Item Type buttons vary from the Admin view.
Customizing other elements
This type of customization can be implemented to any element of the layout. Below is another sample code snippet.

In this example, the custom session variable was set based on the user login. You can use your own logic to define the session variable.
For example, a session variable can be set on a before_event of the ‘Tender Transaction' button and change the tender screen layout based on the total amount of the transaction.
Switching between layouts is very handy if you want different layouts for different purposes in one of RP Prism's default layouts.