Prism Upgrade Manager (PUM)
About Prism Upgrade Manager (PUM)
Retail Pro Prism Upgrade Manager (PUM) enables retailers to automatically deploy Prism updates on a large scale. PUM rolls out upgrades to Prism server machines on a group basis making it easy to distribute and install updates when a new version of Prism is released. PUM also helps prevent "version drift" in which some machines are on a different version or have a different configuration than desired.
One machine in the enterprise serves as the PUM Server. Importantly, the PUM Server CANNOT have Prism installed. The individual Prism servers (PUM Clients) communicate with the PUM server to receive instructions about upgrades, file downloads, customizations, and other tasks. If a problem is encountered, you can use PUM to roll back an upgrade.
PUM Components
- PUM Server: The PUM Web Server is the central hub where groups are created and tasks (e.g., Prism server upgrade) are scheduled. The PUM Server uses IIS web server. Importantly, the PUM Server cannot be a Prism server (cannot have Prism installed).
- PUM Client: The PUM Client must be installed on all servers that will be managed by PUM. The client communicates with the PUM Server and when needed downloads/runs upgrades (and other tasks). These can be regular Prism server installations, or a Proxy-only installation. The PUMClient runs as a Windows service and communicates with the PUM Web server.
- Groups: Groups enable you to group computers for updates. Add nodes to groups according to what versions or products and what profiles they would like to use. Once a group is defined, you can set the profile for the group to define which Prism components should be updated and select which version of Prism to apply to the group.
- Tasks: Tasks are things like upgrades, backups, file downloads, etc. When scheduling tasks, you specify the date and time the task should run and the server groups to which the task applies. The PUM Client polls the PUM Server on a regular basis checking for scheduled tasks, performing the tasks as needed.
Prism Update Manager Client/Server communications flow:

System Requirements
Minimum (e.g., Lab system, Small production)
- Windows 11, Windows Server 2019, or Windows Server 2022 - IIS enabled
- 2.0 Ghz, 4 Core Processor
- 16GB Ram
- 1 TB, SSD Preferred
Recommended
- Windows 11, Windows Server 2019, or Windows Server 2022 - IIS enabled
-8 Core Processor
-32 GB Ram
- 2TB SSD
Limitations
- Minimum Prism version is 1.12.5
- The Web Server CANNOT be a Prism server.
- Some manual cleanup (e.g., deleting old files) may be needed.
Basic Steps
The following basic steps are explained in more detail in the sections that follow.
1. Install the PUM Web server. The PUM server machine should have a MySQL database installed but it should not have Prism installed.
2. Log in to the PUM server and add an Admin User.
3. Install the PUM Client on each Prism server.
4. Configure the PUM client.
5. Assign Client ID(s) to the current user.
6. At the PUM Web Server, login as the admin user. Create groups and assign one or more groups to each server.
7. Schedule tasks. In the task details, select the groups to which the task will be applied.
Step 1. Install PUM Server
Navigate to the PUM Server files.
Launch the PUMServerSetup program.

Enter the MySQL Root user and password.

Click Next.
Confirm the port to be used by the web server. Default = 80. Note: if IIS web server is already configured to port 80, please ensure to configure Apache to a different port to ensure there is no conflict between IIS web server and Apache. Or, alternatively, you must configure IIS webserver to a different port than port 80 if being used by Apache.

Click Next.
Confirm the install path for the PUM server.

Click Next.
Click Install.

Click Finish when the installation is complete.

Step 2. Add Admin User on PUM Server
Once the install is finished, launch a web browser and navigate to http://localhost (specify the port number if using a different port than the default http port 80)
An introduction screen is displayed.

Go to http://localhost/admin/login to create the first admin user.

Enter the username, password and confirm the password. Email is required.
Click the Admin checkbox.
Click Add User.
Log out and log in with the newly created Admin user credentials.
The top of the page has a set of links to the individual areas of PUM:
Top Menu Links
| Menu Link | Description |
|---|---|
| Servers | Displays the list of servers. Add/remove servers. |
| Tasks | Displays the list of tasks. Add/edit/delete tasks. |
| Uploads | Displays the list of files/programs available for upload. |
| Groups | Displays the list of groups. Add/Edit/Delete groups. |
| Admin - Client | View/add/edit PUM client records. |
| Admin - User | View/add/edit user records for users who log in to the PUM server |
| Account | Click to view account information of the current logged-in user. |
| Logout | Click to logout of the PUM web server. |
Step 3. Install PUM Client
Download the install files and then navigate to the location of the files.
Right-click PUMClientSetup_[build number].exe and select "Run as Administrator."

Right-click PUMClientSetup_
By default, the PUM Client will be installed to the C:\PUMClient folder. Click the "Browse …" button to change the install directory if needed.

Click Next > to proceed.
Click the "Install" button to begin the installation.

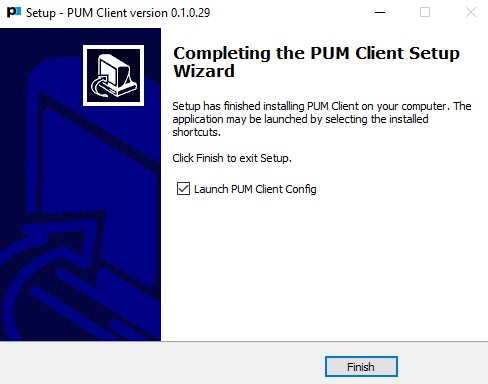
Click Finish when the install is complete.
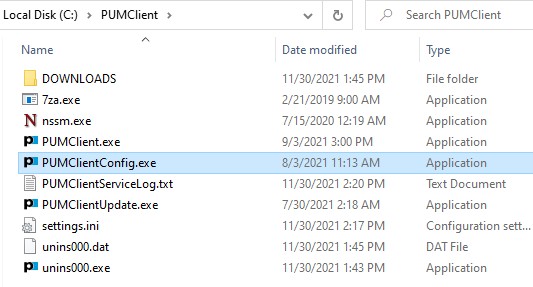
Sample PUM Client files in default C:\PUMClient folder:
Step 4. Configure PUM Client
When the user clicks the Finish button on the Install program, the PUM Client configuration screen is displayed. (Users can also manually display the configuration screen by launching PUMClientConfig.exe. Enter the information needed to establish a connection with the PUM Server. After you correctly configure the PUMClient on a server, the PUM Client will establish a connection with the PUM Server over the specified port.
Refer to the table for information about the settings on the configuration screen.
Sample PUM Client Configuration screen:

Click Save and Exit. A confirmation is displayed explaining that the Client Service will be restarted. Click Yes.
PUM Client Configuration Settings
| Setting | Description |
|---|---|
| PUM Server | The FQDN, IP Address or hostname of the PUM server (web server). |
| PUM Server Port | The port used to connect to the PUM server. Default=80. |
| Client ID | The Client ID is the ID that the PUM Client uses to connect to the PUM Server. Only servers assigned the same Client ID can be upgraded together. |
| Client Password | The password for the entered Client ID. |
| MySQL User | If the PUM Client is on a Prism MySQL server machine, enter the MySQL username used to connect to the database. |
| MySQL Passwords | Enter the password for the entered MySQL User. |
| Prism User | The Prism user who will be used to make the connection to Prism. |
| Prism Password | Password for the Prism User. |
| Backups to Retain | Specifies how many backups to keep. This setting helps avoid filling the hard drive of the PUM Client machine. Backups will be deleted as needed, with the oldest backup deleted first. |
| Polling Interval | The number of seconds the PUM Client will wait before polling the server again. Polling interval can be from 1 to 30 seconds |
| Prism License ID | This is the identifier that is used for Prism licensing purposes. For example, this is the identifier that users are required to enter on the license validation screen when installing the Prism Server 2.0 and above. |
| Prism License Key | The license key for the entered Prism License ID. |
After correctly configuring the PUM Client on a server, the PUM Client will establish a connection with the PUM Server over the specified port.
The PUM Client will poll the PUM Server regularly, checking if any tasks are scheduled for this client. The frequency of the polling is determined by the Polling Interval setting in the PUM Client configuration. Depending on the task, the PUM Client may need to download files from the PUM Server. For example, if the task is an upgrade, the files for the upgrade will be pulled from the PUM Server by the PUM Client and then the PUM Client will automatically launch the installer(s) for the upgrade.
Step 5. Assign Client ID(s) to current user
Next, assign Client ID(s) for the current logged-in user.
In PUM, go to Admin > User.
Click 'Info' for the user you are using.
Select Edit and scroll down to select 'Assign Client ID.'
Select the ID's you want to assign then scroll down again and click 'Assign Client ID's.'
Save the Client Info.
Step 6. Create Groups and Add Servers to Groups
In the Groups area, define groups. After groups are defined, edit individual server records and assign one or more group names to each server. When scheduling a task, you will specify the group(s) to which the task will be applied. This enables multiple servers to be easily upgraded (or have other tasks applied).
To work with groups, click Groups on the top menu.
The list of groups is displayed. Each group is identified by a Group Name and the Client ID. The Group Name must be unique for the Client ID.

Click the Add Group button.
The new group screen is displayed.
In the new group screen:
- Select the Client ID from the dropdown.
- Enter the Group name (Max characters?)
- In the Notes text box you can enter optional information about the group and its servers (Max characters?)
Click Create Group. The new group is added to the list.

Add Server to Group
In the Groups area, click the Info button for the group.

Click the Edit button.

A list of servers assigned to the group is displayed.
Click Assign Servers.

A list of unassigned servers is displayed. Select the individual servers you want to assign to the group and click Assign Servers.
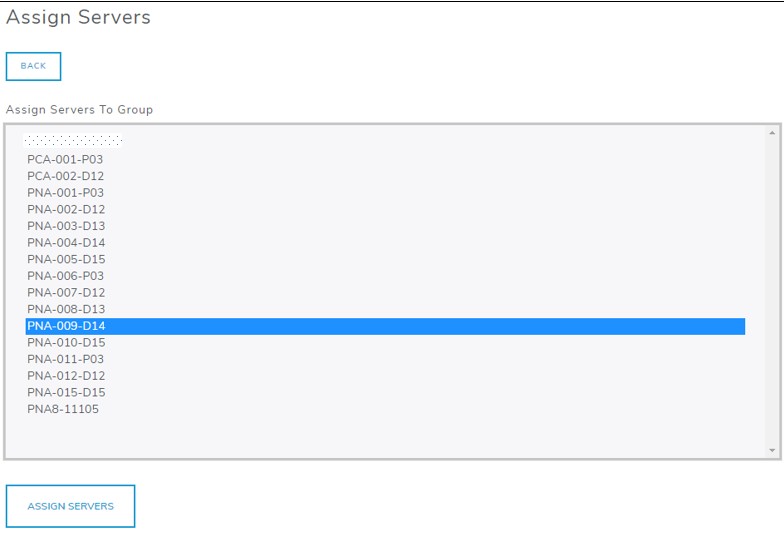
The assigned servers are now displayed in the server list.
Unassign a Server from a group
In the server list, click the Unassign button. The server is removed from the list of assigned servers. If the user needs to reassign the server, click

Step 7. Schedule Tasks (Upgrades) for Server Groups
Tasks are the individual jobs that you schedule to be performed. For example, backing up the database is a task and so is upgrading the version of Prism. These tasks are typically performed together so a combination task "Backup and Upgrade" will first backup the database, and then upgrade the Prism version in a single task.
Click Tasks on the top menu to display the list of defined tasks.
Sample Task List:

Available Tasks
The following table lists the available tasks that can be scheduled on the PUM web server.
| Task | Description |
|---|---|
| Backup | Backs up the database by creating a .zip file. |
| Upgrade | Upgrade the database to a newer version. |
| Backup and Upgrade | Best practices call for backing up the database before upgrading. This task combines the backup and upgrade in a single task. |
| Customizations | Downloads the specified customization |
| Rollback | Rollback a backup. When rolling back a backup, |
| File Download | Download the specified file |
| Run Download File | This task will run the download file you specify. |
| PUM Client Update | Upgrades the version of the PUM Client on the Prism server. |
| PUM Client Settings | Updates the PUM Client settings.ini file |
Schedule Task
Click the Schedule Task button.

The Schedule Task screen is displayed. Enter information in the fields and click the Schedule Task button at the bottom of the screen. Refer to the table for information about the available fields.
Task Settings
| Filter Field | Description |
|---|---|
| Client ID | Select the Client ID from the drop-down. Only servers for the same Client ID can be grouped and have tasks scheduled |
| Groups | The Group(s) to which the task will be applied. |
| Task | Select from the list of available tasks. See the "Available Tasks" section for information about each task: Backup, Upgrade, Backup and Upgrade, Customizations, Rollback, File Download, Run Download File, PUM Client Update, PUM Client Settings |
| Date | The date the task will run. |
| Time | The time on the scheduled date the task will run. |
| Notes | Optional notes about the task. |
Sample Task Details:

Filter Tasks
You can filter the task list to make it easier to find a task (e.g., to check if a task has already been defined).
In the Tasks area, click the Apply Filters button.

A screen for defining filter criteria is displayed.

Enter filter criteria by making selections from the dropdowns and selecting dates. Click Apply Filter. Refer to the following table for more information.
| Filter Field | Description |
|---|---|
| Client ID | Select the Client ID from the drop-down. Only servers for the same Client ID can be grouped and have tasks scheduled. |
| Group | Select one of the defined groups from the drop-down to only display task applied to the selected group. |
| From Date/To Date | Click the calendar icon to select a From Date and To Date. Tasks scheduled within the date range will be included in the filtered results. |
| Task | Select a Task to filter the list to display only tasks of the selected task type: Backup, Upgrade, Backup and Upgrade, Customizations, Rollback, File Download, Run Download File, PUM Client Update, PUM Client Settings |
| Status | Select a status to include only tasks that currently have that status: Pending, Running, Completed, or Failed |
Servers
Assign one or more groups to individual servers by editing the server's record in the "Servers" area of the PUM Server.
Click Servers on the top menu. The list of servers is displayed. Each correctly configured PUM Client will automatically establish a connection with the PUM Server and be displayed in the list. If you don't see a server listed, check the server's PUM Client configuration.

Filter the Server List
There may be many PUM Clients managed by a PUM Server. Above the server list are drop-downs that will filter the list of servers and make it easier to find a specific server.
Select the desired values from individual drop-downs as needed and then click Apply Filters. The list is filtered based on the drop-down selections.

Clear Filters
After applying a filter, a Clear Filters button will be displayed on the UI. Click the Clear Filters button to remove all filters. This is useful if you want to start over and filter the list using different criteria.

View Server Info
Click the Info icon for an individual server. ![]()
At the top of the screen is a set of buttons, including an Edit button. If you click the Edit button, the only information that can be edited is the Notes field.

Server Information Fields
| Field | Description |
|---|---|
| Server Name | The name of the PUM Client. |
| Client ID | The Client ID of the BP or customer. |
| Groups | Comma-separated list of the groups to which the PUM Client is assigned. |
| Prism Version | The version of Prism that the PUM Client machine is using. |
| PUM Client version | The version of the PUM Client that is installed. |
| Windows Version | Windows version of the PUM Client machine. |
| Disk Utilization | Current disk utilization percentage of the PUM Client machine. |
| Database Type | The type of database of the PUM Client: Oracle or MySQL. |
Uploads
The tasks that you define can include one or more files that will be uploaded to the PUM Client machines. Typically, these files are compressed into a .zip file first and the .zip file is uploaded and attached to a task.
Important! The .zip file uploaded by the user needs to match the extracted folder name. For example: if the .zip file is 1.14.7.1911.zip, when that file is extracted, the folder must be 1.14.7.1911.
Upload File
To work with file uploads, click UPLOADS on the top menu.
A list of files is displayed.
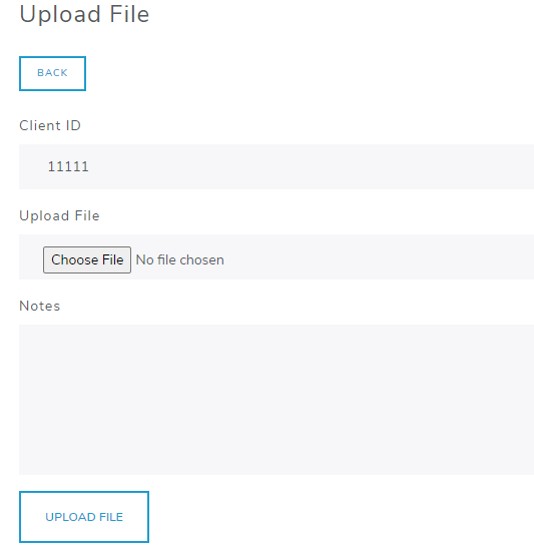
Click Upload File.

Click the Choose File button and navigate to/select the file to be uploaded.
Click Upload File. The file is added to the list available files.
Upload Info
Click the Info button to view details about the file:
Click Back to return to the list of upload files.

Admin
In the Admin area, you can view/add/edit client and user records.
From the top menu, click Admin and then select Client or User.
Admin - Client
Select Admin - Client to view a list of existing clients managed by PUM. These are the PUM Clients configured by the user.

Add Client
On the Client list screen, click Add Client.
The new Client screen is displayed.
Enter client details and click Add Client to save (see table below).
| Field | Description |
|---|---|
| Client Name | The username for the new client |
| Client ID | The Client ID(s) managed by the user. |
| Password | Password for the entered client name. |
| Notes | Optional notes to describe the client |
Sample Client record:

Admin - User
Select Admin - User from the top menu to display a list of users.

Add User
On the User list screen click Add User. A screen for entering details about the user is displayed.
Enter the user's details and click the Add User button at the bottom of the screen to save the changes.
Add User Fields
| Field | Description |
|---|---|
| Username | Username of user being added. |
| Email address of the user being added. | |
| Password/Confirm Password | Enter the password for the new user and type it again to confirm. |
| Admin | If the Admin checkbox is selected, it indicates the user is an Admin user. Admin users can add/edit users and perform other administrative tasks. |
| Client ID | Client ID(s) managed by the user. |
| Notes | Optional notes to describe the user. |
Sample Add User screen:

Account Info
This area enables you to view the Client IDs associated with the current logged-in user's account.
Click Account on the top menu.
The screen displays the Name, Email and Client IDs for the user.
Sample account info:

PUM Top Menu
The top of the page has a set of links to the individual areas of PUM: 
Top Menu Links
| Menu Link | Description |
|---|---|
| Servers | Displays the list of servers. |
| Tasks | Displays the list of tasks. |
| Uploads | Displays the list of files/programs available for upload. |
| Groups | Displays the list of groups. Add/Edit/Delete groups. |
| Admin | Client: View/add/edit PUM client records. User: View/add/edit user records for users who log in to the PUM server |
| Account | Click to view account information of the current logged-in user. |
| Logout | Click to logout of the PUM web server. |