Accounting Link - QuickBooks
Prism Accounting Link serves as an information bridge between Prism and various types of accounting software (e.g., QuickBooks). This document is targeted to QuickBooks users. Using Prism Accounting Link, you can export transactions (receipts), general ledger, accounts receivable and accounts payable information from Prism into a format that can be imported into QuickBooks.
Requirements
(Prism 2.0 users only) Users must not edit documents in Prism after export to QuickBooks. Editing a document again (in Prism 2.0) will reset the proc_status flag, causing the document to be resent, which in turn has the potential to impact accounting.
The current release of Prism Accounting Link is only compatible with Oracle database type. MySQL is not currently supported.
Basic Steps
Each of the basic steps is explained in more detail in the sections that follow.
1. Configure Prism settings and records related to Accounting Link:
2. Install Prism Accounting Link.
3. Configure Accounting Link general preferences.
4. Configure Accounting Link preferences for QuickBooks.
5. Initialize Customers and Vendors.
6. Read Prism data into Accounting Link.
7. Review batches.
8. Post batches.
9. Import the batch data (in the form of .iif files) into QuickBooks.
Initial Release Known Issues
- The Append Installation ID to Customer ID preference must be disabled for each Subsidiary. This preference is found in Admin Console > Node Preferences > Customers.
- Certain flags used to track the accounting status of documents have yet to be added to the RPS database. In addition, there is no way to edit these flags in the UI yet.
- Payroll and time card features are scheduled for a future release.
Configure Prism for Accounting Link
The following sections explain necessary configuration in Prism for using Accounting Link:
- Configure security.
- Set Accounts Payable flag in Vendor records.
- Set Accounts Receivable flag in Customer records.
- Define fee types
Accounting Link Security
Security for Accounting Link is handled differently in Prism 2.0.1 and earlier compared to Prism 2.1 and later.
In Prism 2.0.1 and earlier, there are no security permissions available for Accounting Link. Instead, to access Accounting Link a user must have the "System Admin" flag selected in the Employee record.
In Prism 2.1 and later, there are security permissions available. Navigate to Admin Console > Store Operations > Employees > Groups. Select a group, and then click Edit > Details.
The following tables lists the available permissions for Accounting Link in Prism 2.1 and later:
| Permission | Description |
|---|---|
| Acct Link - Batches - Delete | Allow group members to delete batches. |
| Acct Link - Batches - Log | Allow group members to access the error log. The error log location is [path]. |
| Acct Link - Batches - Post | Allow group members to post batches. |
| Acct Link - Batches - Read/Unmark | Allow group members to read data from Prism as well as unmark batches. |
| Acct Link - Batches - Update Information | Allow group members to update customers and vendors. |
| Acct Link - Batches - View | Allow group members to view batches. |
| Acct Link - Options - Initialize Information | Allow group members to initialize customers and vendors. |
| Acct Link - Options - Preferences | Allow group members to save changes to Accounting Link preferences. |
Accounts Receivable Flag on Customer Records
In the Prism customer record, select either Export or Yes in the Accounts Receivable field for each A/R customer.
The following table explains the available settings for the Accounts Receivable field on customer records:
| Option | Description |
|---|---|
| Export | Select this option to establish an A/R account for the customer in QuickBooks. This flag indicates that Accounting Link will export the customer record during the next Customer Update. Once exported to the accounting software, the Accounts Receivable field value on the Prism customer record changes to Yes. |
| Yes | Select this option to indicate that the customer already has an A/R account in your accounting software. Accounting Link will read receipts involving customer and containing an A/R tender for later posting to both the G/L and A/R accounting modules (Define A/R tenders in Link preferences). |
| No | Select this option to have Accounting Link ignore the customer when reading data. |
Accounts Payable Flag on Vendor Records
Select Export or Yes in the Accounts Payable field for each A/P vendor.
The following table lists the available settings for the Accounts Payable field on vendor records.
| Option | Description |
|---|---|
| Export | Select this option to establish an A/P account in QuickBooks for a vendor. Accounting Link will read the vendor information and export it (in the form of .iif file) during the next Accounting Link Vendor Update. After a vendor record is exported, the Accounts Payable field value on the vendor record changes to Yes. |
| Yes | Select this option to indicate that the vendor has an A/P account in QuickBooks. Vouchers involving this vendor will be read for later posting to Accounts Payable. |
| No | Select this option to have Accounting Link ignore the vendor when reading data. |
Fee Types
When Accounting Link reads a receipt or voucher that contains a fee type, it assigns the fee amount to the account defined for the fee in Accounting Link Store Account Manager. If Accounting Link is unable to detect a corresponding fee type, Accounting Link assigns the fee amount to the Fee 16 field (the ‘catch all' fee field). This catch-all fee field accommodates fee types used on older receipts and vouchers that are not defined in Prism preferences.
Sample Accounting Link Store Account Manager showing Receipt Fee 16 entry:
 Admin Console > Node Preferences > Transactions > Fees/Shipment:
Define fee types for transactions in Admin Console > Node Preferences > Transactions > Fees/Shipment. Define a Payment on Account (POA) fee type if the business accepts payments on in-store charge accounts. A POA fee type allows a customer to make a payment on an Accounts Receivable account through Prism. (Such a transaction will have an Accounts Receivable Fee and customer instead of an Accounts Receivable tender and customer.)
When defining fee types for transactions, be sure to select the Req. Customer flag for Accounts Receivable fee types, such as POA.
Admin Console > Node Preferences > Purchasing > General:
Define fee types for vouchers in Admin Console > Node Preferences > Purchasing > General.
Install Prism Accounting Link
Download Accounting Link at [path].
Navigate to the location where the Prism Accounting Link install files are located.
The first time, Accounting Link must be launched using the "Run as Administrator" option. Right-click PrismALInstaller.exe and select Run as administrator.

The End User License Agreement is displayed. Click the radio button for "I accept the agreement" and click Next.
The default install location is C:\PrismAcctLink. Click Next.
The next screen shows the Accounting Link instances to install. Each instance represents an active Subsidiary. Select or clear individual subsidiaries as needed. The screen will also detect and mark whether each subsidiary is a "new install" or "already installed - update needed." By default, all instances will be checked.
Click Next.

The Accounting Link Configuration screen is displayed only for a "fresh" installation. It allows the user to enter Prism webserver information to configure the acctlink.ini file for all selected instance(s). For an "over-the-top" install, this screen is not displayed. Click Next.
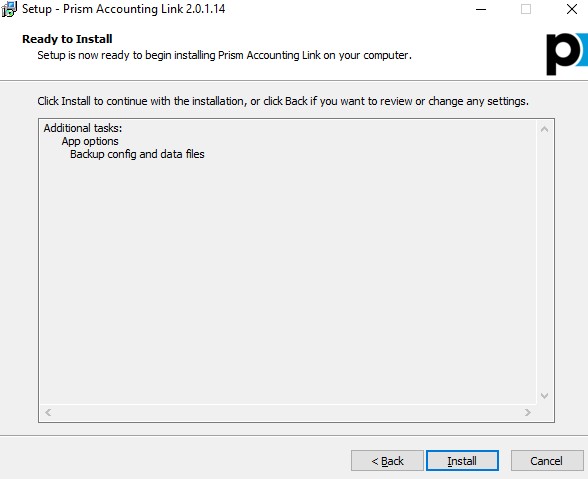
The Additional Tasks screen is displayed only during an "over-the-top" installation. It allows the user to select ‘app options' to backup files. The backup will be stored as backup_[current timestamp].zip file in the install directory. Click Next.

Enter the Fully Qualified Domain Name (FQDN) of the Prism server where Prism Accounting Link will be installed. The Port number should be "80" and the Protocol should be "http." Click Next.
Click Install to start the installation.
The screen displays the progress of installation.
When the installation finishes, click OK.
Click Finish to exit the wizard.
Note: Installer logs and other related files can be found in the C:\Program Files (x86)\Retail Pro\PrismAcctLink folder.
Launch Accounting Link
Navigate to the C:\PrismAcctLink\[Subsidiary] folder. The first time AcctLink.exe is launched, it must be launched using Administrator rights. Right-click AcctLink.exe and select "Run as administrator."
Accounting Link Logon
Login is required to launch Accounting Link. Enter the User Name and Password of a Prism user who belongs to a group with permission to launch Accounting Link (or in Prism 2.0.1 and earlier, a user with the "Sysadmin" checkbox selected). Click Login.
Accounting Link Home Screen
Upon successful login, the Accounting Link home screen is displayed.
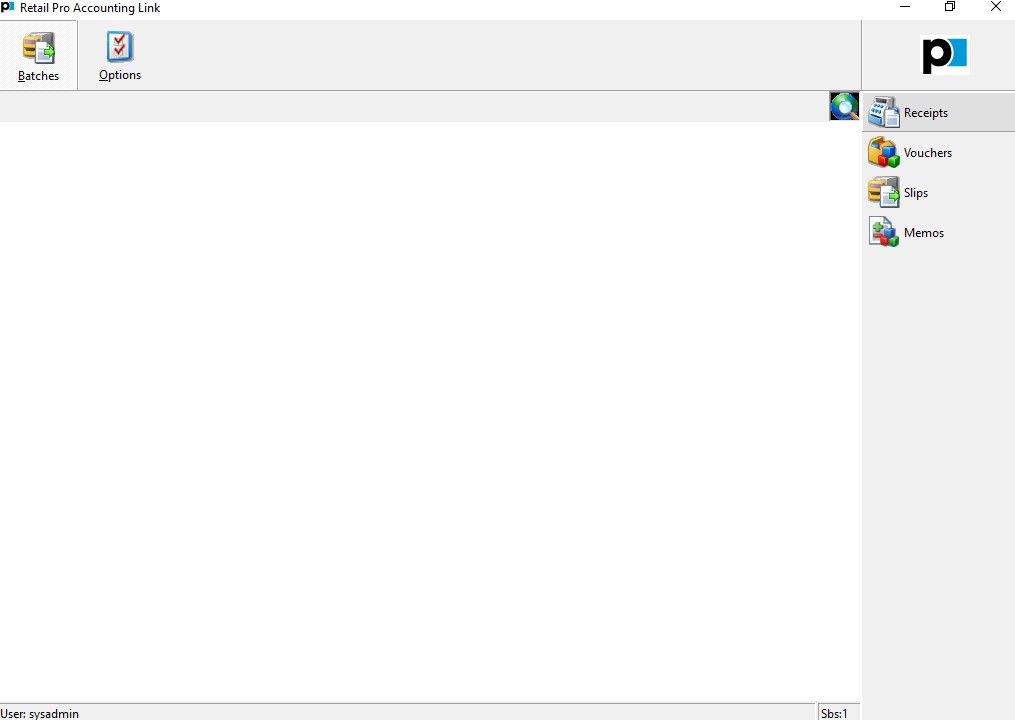
Accounting Link navigation buttons
At the top of the main screen, a pair of buttons provide access to areas for working with Batches and configuring Options. The following table lists the Accounting Link navigation buttons and modules:
| Button | Description |
|---|---|
 |
Select Batches on the top menu to access a side menu for choosing document types. Select one of the document types to see a list of all batches created for that document type. By default, you will only see batches that have not been sent to the accounting system (batches flagged as Marked or Preview). You can optionally include batches that have been sent to the accounting system (archived batches). |
 |
Select Options on the top menu to access a side menu for defining preferences, initializing customers and vendors, and viewing logs |
 |
In the Preferences module, select the accounting software you will use and define settings for using Accounting Link with the software. |
 |
Click Initialize Customers to read customer data from Prism. Customers with the AR field set to Export or Yes will be exported to Accounting Link. |
 |
Click Initialize Vendors to read vendor data from Prism. Vendors with the AP field set to Export or Yes will be exported to Accounting Link |
 |
In the Receipts module, read and post receipt batches. |
 |
In the Vouchers module, read and post voucher batches. |
 |
In the Slips module, read and post transfer slip batches. |
 |
In the Memos module, you can read and post adjustment memo batches. |
 |
Click Subsidiaries to view the subsidiary allocation. The status bar displays the current subsidiary number. |
Accounting Link General Preferences
Follow these steps to configure the Accounting Link general preferences. Each of the steps is explained in more detail in following sections.
1. Select QuickBooks for each accounting module needed (GL, AR, AP) in Preferences > Prism Accounting Link.
2. Configure General Ledger Accounts (Preferences > GL Accounts). This enables you to customize account codes, account names and sub-accounts.
3. Configure General Ledger Options (Preferences > GL Accounts > Options).
4. Configure Accounts Receivable options (Preferences > AR Options). This tells the system what tenders to track and how to handle customer names, addresses, and IDs.
5. Configure Accounts Payable settings (Preferences > AP/TC Options). This tells the system how to handle vendor names, vendor addresses and vendor payment terms.
6. Configure Preferences > System Options (preferences that apply to all batch types.
7. Define Store Accounts (Preferences > Store Account Manager).
Note: This documentation assumes that the QBFS folder is accessible from the user's local system. The QBFS folder location is typically the default QuickBooks installation path.
Select QuickBooks for each Accounting Module
Click Options on the Accounting Link top menu.
Click Preferences.
Select the top-level node (Prism Accounting Link).
Select QuickBooks from the drop-down for each desired module (GL, AR, AP)
Save the changes.
Accounting Link Preferences (top-level) with QuickBooks selected for each supported module:

Configure General Ledger Accounts
In GL Accounts, enable the Flexible Account Structure option. Click Yes to confirm the change. Typically, accounts are numbers only; however QuickBooks accounts include text characters. Enabling this option allows Accounting Link to work with accounts that include text.
The rest of the GL Accounts preferences can be ignored. The next set of preferences for QuickBooks users to configure are GL Options.
Sample Accounting Link General Ledger accounts:

Inactive Records
If you inactivate data records in Prism, Accounting Link does not automatically purge these records, and instead marks them as inactive. In some cases, it may be necessary to edit sub-accounts for an inactive department because there are related documents that still reflect details about the inactive department. For values that do not use the active/inactive status, Accounting Link checks existing known fields against fields in Prism and advises you that field variations exist.
You can choose if Accounting Link should adopt the new values (potentially losing existing data) or continue to use existing values. If you opt to use the Prism data, all previous values and defined information are deleted.
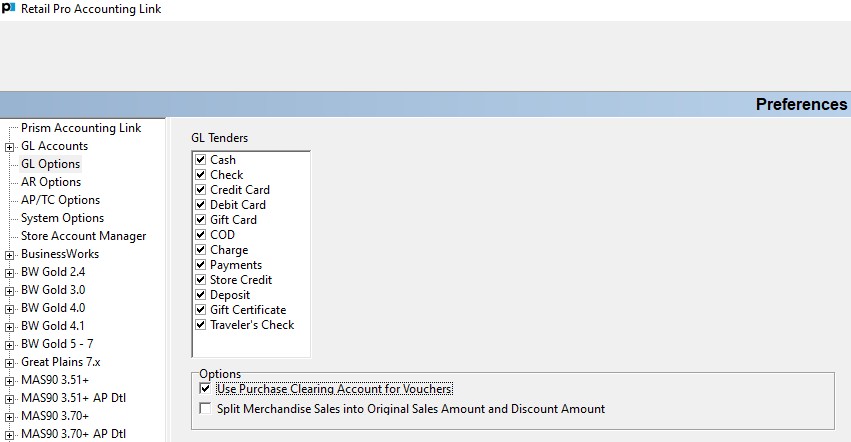
General Ledger Options
In Preferences > GL Options, select the receipt tenders that Prism Accounting Link will recognize. There are also a few special account options.
Sample Preferences > GL Options:
 Refer to the following table for information on the available GL Options:
| Option | Description |
|---|---|
| GL Tenders | Select each tender to be included when receipts are read into Accounting Link. Only tenders that are selected will be recognized by Accounting Link and posted to the accounting software General Ledger. The choices are: Cash, COD, Store Credit, Gift Card, Check, Charge, Deposit, Debit Card, Credit Card, Payments, Gift Certificate, Traveler Checks When reading transactions, a split tender receipt containing any tender not selected will not be read for G/L and Accounting Link will display an error message. |
| Use Purchase Clearing Account | Purchase Clearing account tracks merchandise received into inventory, but for which no vendor invoice yet exists. From an accounting standpoint, since the merchandise is now on the store shelves, it adds value to inventory. Since there is no vendor invoice yet, the actual "Payable" amount to enter in QuickBooks is unknown.
|
| Split Merchandise Sales into Original Sales Amount and Discount Amount | Display and post merchandise sales information as either: A single net sales account, including any line-item discounts. Two separate accounts, one for the original merchandise sales amount and one for the discount amount. To display and post as two separate accounts, select Split Merchandise Sales into Original Sales Amount and Discount Amount |
Accounts Receivable Options
Tenders and Fees
In Preferences > AR Options, specify which Prism tenders and fees should post to Accounts Receivable. To post to Accounts Receivable, a transaction MUST include: An Accounts Receivable tender or an Accounts Receivable fee AND an Accounts Receivable customer.
A transaction does not post to Accounts Receivable if either of the following conditions exists:
- Contains both an A/R tender and an A/R fee.
- Includes an A/R tender or fee, but not an A/R customer.
Refer to the following table for information on the available A/R options:
| Option | Description |
|---|---|
| AR Tenders | Select each tender that you want posted to A/R. |
| Fees | Select each Fee that you want posted to A/R. Fees are transaction charges in Prism that need not be associated with a particular line item. One fee is commonly set up as a Payment on Account (POA). A POA allows a customer to make a payment on an A/R account through Prism. |
| Write aging code to customer INFO 2 | The aging code indicates how tardy the customer has been in making payments. Define the stages of aging status in the accounting software. If enabled, the aging code will be imported to the Info 2 field in Prism customer records. |
| Use external default terms | If selected, Prism Accounting Link will not post any Prism customer payment terms information, including due date and discount available, when sending A/R batches. If disabled, it means you choose to use the values payment terms defined in Prism customer records. You can further specify a due date for the COD tender. The COD due date is defined as the number of days following the transaction date. The minimum that can be set is 1 day and the maximum is 99 days. This date applies only to A/R transactions using COD, when COD is configured as an A/R tender. |
| Import customer balances | Select to import customer credit balances into Prism from QuickBooks when updating customers. The balance is the positive or negative dollar value associated with the Customer Accounts Receivable account. |
| COD Due Date | If using Prism Customer payment terms instead of external terms, define the COD due date (the default is 7 days). |
| Customer name order | In Prism, a customer's name consists of separate First Name and Last Name fields each with a 30-character maximum. Depending on the accounting software, the two Name fields may be combined, and, if necessary, shortened for posting. The Name fields can be combined as either: Last First - Last Name followed by First Name First Last - First Name followed by Last Name |
| Convert customer ID | This setting enables you to convert customer IDs to a certain fixed length. (Note: This setting is primarily for MAS 90 users because of differences in how customer IDs are handled in MAS90 and Prism, but it can be used by users of other accounting packages. Refer to the Convert Customer ID section which follows this table.) |
| Retail Pro Address 1 - Address 3 | Accounting programs support a variety of address fields. As a result, the Retail Pro address fields must be mapped to the accounting address fields, as appropriate: None, Accounting Address 1, Accounting Address 2, Accounting City/State. If you are using only Address fields 1 and 3 in Prism, you will want to configure the addresses so that a blank line does not appear on accounting bills for the unused address field. In this case, Prism Address 1 and Address 3 must be configured to populate specific accounting address fields and Address 2 configured to None. Note: City and State are normally combined in the Prism Address 3 field. To accommodate accounting programs that store this information in two separate fields, separate City and State with a comma when entering that information in Prism. If the Node Preferences > Customers > Allow Duplicate Customer IDs preference is enabled, two or more customers can have the same Customer ID. This will create a problem with A/R customers who share an ID. Information associated with the Customer ID is sequentially merged during updating via Accounting Link. As a result, amounts (such as balances) end up being combined and recorded for each customer who shares the Customer ID. As such, it is recommended that retailers who use the Accounting Link do not select this Prism preference. |
Accounts Payable
In Preferences > AP/TC Options, define Accounts Payable information for vendors, including default vendor terms.
Refer to the following table for information on the available AP/TC options:
| Option | Description |
|---|---|
| Vendor Name Order | This option is similar to the A/R customer name order option except that here it applies to the A/P vendor contact name |
| Retail Pro Address 1 - Address 3 | For each Retail Pro Address field, select the matching accounting address field. |
| Use external default terms | If selected, Prism Accounting Link will not post any Prism vendor terms information, including due date and discount available, when sending A/P batches. If not selected, vendor terms information from Prism vendor records is used. |
| Advance EOM to next month for the last | If using Prism vendor terms, you have the option to also define the number of days at the end of a month that are to be considered "in the next month" for an EOM payment date. EOM is a terms type in which the payment is due at the end of the month. If the purchase is made near the end of the month, there may only be a few days before it would be considered due. To accommodate this, after a certain date, purchases can be considered to be "in the next month" for payment purposes. For example, if the EOM date is set to 10, a purchase made anytime during the last 10 days of September would be considered as an October purchase, and the EOM payment date would be October 31, not September 30. |
| Time card overtime starts after | (Not applicable to QuickBooks) |
System Options
In Preferences > System, define options that include:
- Defining batch deletion and purging instructions
- Choosing the placement of the side toolbar
- Specifying the default web page that is to be displayed in the Accounting Link on the home screen.
Refer to the following table for information on each of the available options:
| Option | Description |
|---|---|
| Send all active marked batches when posting | If selected, Accounting Link sends all marked batches when posting batches, instead of just the selected batch. |
| Automatically delete batches after logging in | Select "Automatically delete batches after logging in" to enable other delete and purge options. Delete and purge options apply only to Preview and Posted batches. Users cannot delete or purge Marked batches; Marked batches remain in the Link until posted or unmarked. Delete removes a batch from Link use and flags it as ready for purging. The Purge function permanently removes a deleted batch from the system. |
| Delete preview batches when they are older than how many days? | (Only available if "Automatically delete batches after logging in" is enabled). If enabled, Accounting Link automatically deletes Preview batches after the specified number of days is reached. |
| Delete posted batches when they are older than how many days? | (Only available if "Automatically delete batches after logging" is enabled). If enabled, Accounting Link automatically deletes Posted batches after the specified number of days is reached. |
| Ask for confirmation for automatic deleting | (Only available if "Automatically delete batches after logging" is enabled). If enabled, Accounting Link requires user confirmation for automatic deletion to proceed. |
| Ask for confirmation for purging | (Only available if "Automatically delete batches after logging" is enabled). If enabled, Accounting Link requires user confirmation for purge to proceed when a user accesses Link preferences and purge-ready batches exist. (Be sure to enter preferences on a regular basis to trigger this purge action.) |
| Toolbar at right side | The Accounting Link side menu can be on the right or left side. This feature accommodates a right- or left-handed user or simply personal preference. If enabled (default), the menu is on the right side of the window. If disabled, the menu is on the left side of the window. |
| Web Page URL | Enter the address for a web page that you want to display in the Accounting Link browser window. Requires Internet access. Prism Accounting Link will attempt to establish Internet access immediately after login. If a web address is not specified, the area where the web page is normally displayed will be blank. |
| View browser controls | If selected, the browser window includes various browser controls (e.g., Back, Forward, Home buttons). |
Store Account Manager Options
In Options > Preferences > Store Account Manager, define the following settings:
- Indicate active stores by selecting the "Use" checkbox
- Identify accounting companies
- Define account IDs for individual stores and/or the whole company
- (optional) Combine certain tenders for posting
Note: Accounting companies and COA should already exist in QuickBooks.
Accounting Link creates store records by reading the information from Prism.
Sample Store Account Manager preferences:
 Stores
An accounting company is the company to which the selected store's information is to be sent in the accounting software. An accounting company code must be defined for all active stores.
For every store, enter the Company code for the accounting company you want to use with the related store. The company is defined in the accounting software.
Note: Be sure to enter the accounting company code, not the company name.
Select Use to indicate that the store is active for use with the Accounting Link.
If the Use flag is selected, Accounting Link will attempt to post information to the accounts you have defined. If an account does not exist, Accounting Link will not be able to post the related information. Instead a message is generated for the batch log.
Additionally, a store must be active (and have a code defined in Retail Pro) in order for AR status information to be sent from the accounting software to Retail Pro during a customer update.
If the Use flag is not selected, Accounting Link will not attempt to post information for the particular store nor retrieve AR status information from the accounting software for that store.
Delete Old Stores
If you have a store defined in Accounting Link that is no longer in use in Prism, click Delete Old Stores to remove the store from Store Account Manager preferences.
Define Accounts
In the Define Accounts area of Store Account Manager, view/edit/reset the Chart of Accounts for the entire company or for individual stores.
To update the values in the "Define Accounts" grid, select "Entire Company" from the dropdown at the top and click Reset button. You will be prompted with "Set the Account IDs to defaults?" confirmation message. Choose YES to close the dialog prompt. You will see all the updated accounts information if anything changed from old default values to new default values
Mapped segments of an account ID cannot be edited. If you want to remove segment mapping, do so through the GL Accounts preference, but remember that the accounts you define here must be defined in QuickBooks as well. (The Check COA function determines if any accounts must be defined in the QuickBooks COA.)
Assigning Accounts for Multiple Stores at One Time
If most of your stores are to have the same Account IDs assigned to them, assign those IDs by selecting Entire Company. This populates the Account IDs for every store. Then select individual stores and make any necessary store-specific assignments.
Edit Account IDs
Click an account's Account ID field to enter edit mode.
2Provide the account information using one of the following methods:
Enter or edit the Account ID.
Copy an account from the QuickBooks COA. Click the selection button to display the QuickBooks COA. Select the account to copy and click OK. (Alternatively, double-click the account to copy it.) The Account ID in the table now matches the account in the QuickBooks COA.
During posting, Accounting Link will attempt to post information to these accounts (structured and mapped as you have defined in GL Accounts and with the proper accounting software separators). If those accounts do not exist in QuickBooks, an error message is generated, displayed, and temporarily stored in a batch log.
About Account IDs
An account ID can be made up of one or more segments. In QuickBooks, the segments represent a hierarchy of accounts and sub-accounts. Each successive segment provides an additional level of detail. Accounting Link allows up to five segments, with one to six characters for one main account segment and four sub-account segments.
An account ID must consist of at least one segment - the main account segment.
All selected segments must be at least one character in length.
Active sub-account segments must be selected in increasing numerical order. For example, to select the sub-account segment 3, sub-account segments 1 and 2 must already be selected.
Account IDs are usually numerical but in some accounting programs they can be descriptive names.
If a COA has not yet been defined, the default Link COA is displayed. If Entire Company is selected, account IDs that differ between stores are not displayed. For example, Store 001 has Cash assigned to account ID 1010-00 and Store 002 has Cash assigned to 1020-00. When Entire Company is selected, the account ID field for Cash contain *VARIES* because the stores differed for this account ID. Conversely, if all stores have Cash assigned to 1010-00, that account ID is displayed when Entire Company is selected.
Access to the QuickBooks Chart of Accounts
For Accounting Link to display the QuickBook's Chart of Accounts, the following must be completed:
- All necessary General Ledger configurations for the accounting company are complete in QuickBooks.
- The path to the QuickBooks company file is defined in Options > Preferences > QuickBooks.
- The selected store is flagged as active, and a valid accounting company is defined in Options > Preferences > Store Account Manager.
The COA that is displayed is for the accounting company assigned (per your earlier Store Account Manager preference setting) to the selected store. If you are defining accounts for the entire company rather than a particular store, and multiple accounting companies are involved, the COA for the current location is displayed. Use the displayed QuickBooks COA to modify Accounting Link accounts or simply to confirm that an account exists in the QuickBooks COA.
Check COA
After defining accounts in Accounting Link, check if any are missing in QuickBooks using the Check COA feature. The Check COA feature scans the QuickBooks COA and compares it with the Accounting Link COA for the selected store. (If Entire Company is selected then Check COA scans for all active stores) The structure, mapping, and account IDs are compared when Check COA is selected. Every account in Accounting Link COA must have a match in the accounting company COA - including all sub-accounts (as defined in the GL Accounts preference).
Any missing accounts are listed. Re-enter QuickBooks and create the needed accounts. Use Check COA again to confirm all accounts are created.
COA Log
Accounting Link stores discrepancies detected during Check COA in a COA log. Click COA Log to view the log. A COA log is only temporary. It remains available for review only until the next scan of an accounting software COA.
Reset COA
If necessary, you can reset the list of accounts for the currently selected location (entire company or an individual store) to the default COA. As with any Accounting Link Preference modification, you must select Save when exiting Preferences to retain the change.
Note: The default COA is stored in: …\PrismAcctLink\[Subsidiary]\Modules\QB\GL\Defaults.ini.
Warning! For the default accounts to be accurate, you should change them to represent your own accounts.
Consolidating by Company, Region, or Store
Assigning the same Account ID to a particular account type allows custom consolidation options. For example, assigning the same inventory account to a group of stores can provide a regional consolidation within your accounting software. Within the same accounting company, each store's accounts are tracked individually. As a result, you can combine the various consolidation options. Within the same accounting company, inventory can be combined for all stores, sales can be tracked on a regional basis, and adjustments can be tracked on a store-by-store basis - all at the same time.
Options (Tender Consolidations)
You have the option to handle certain multiple tenders as a single tender for accounting purposes. This commonly applies to the combination of Cash and Checks because their combined value is what is deposited at the bank each evening. When the bank statement is later received, the deposit amounts can be quickly scanned to compare with the combined cash and check totals - without having to manually add the values.
This feature can also be applied to Debit and Credit Card 1 (CC1) through Credit Card 5 (CC5) tenders. Per your selections, assign the selected tenders the same account ID in the accounts table.
Accounting Link QuickBooks Preferences
This section has information about Prism Accounting Link settings that are specific to QuickBooks (Preferences > QuickBooks).
Set Path to QuickBooks Company File
Select Options > Preferences.
On the left is a set of nodes that can be expanded/collapsed to display/hide settings.
Scroll down to the QuickBooks section.
Select the top node: QuickBooks.
The only field is "Path to QuickBooks installation." Click the folder icon and navigate to the company file location.
Save the changes.
Sample Accounting Link Preferences, QuickBooks top-level node:

QuickBooks Accounts Payable (AP) Settings
This section explains how to configure accounts payable settings for QuickBooks.
Select Options > Preferences > QuickBooks > AP.
Enter the name of the main AP account, Clearing AP account and other options as needed. Save the changes.
Sample Accounting Link QuickBooks Accounts Payable settings:

Refer to the following table for information about the available settings:
| Preference | Description |
|---|---|
| Include what information in AP voucher Comment | Select the information to display in the Comment field on AP vouchers. None (blank comment) PO#/Store/Controller Arrival Date/Store/Controller Voucher#/Store/Controller |
| AP Account | The main AP account. Defined in QuickBooks > AP and in QBFS. AP account is NOT entered in Store Account Manager. |
| Return AP Account | Enter the account to use as the Return AP account. |
| Clearing AP Account | The Purchase Clearing account allows retailers to track payable postings prior to applying them to AP. The Clearing AP Account is REQUIRED for QBFS users. Defined in QuickBooks > AP AND Store Account Manager. In GL Options select the "Use Purchase Clearing" checkbox. The Clearing AP account is typically assigned a type of "other current liability." |
| Auto-update vendors | If selected, vendors are automatically updated when reading data. |
| Identify vendors by | In QuickBooks, vendors are identified by their Vendor Code and Vendor Name. Vendors can be exported from Prism in one of two formats: VEND_vendor code vendor name_V_vendor code |
| Prepend AP invoice number with "INV#" | This preference enables retailers to control whether "INV #" is prepended to accounts payable invoices. By default, this preference is CHECKED, meaning invoice numbers ARE prepended with "Inv#." Retailers must clear the preference if they want to display AP invoice numbers without "INV#" prepended. |
About Purchase Clearing
The use of purchase clearing is optional. To enable purchase clearing, select the Use Purchase Clearing Account for Vouchers option in Preferences > GL Options. Next, in Preferences > Store Account Manager, select the AP Clearing Account you defined (NOT the AP account!). Click the icon to display a list of accounts.
The purchase clearing account tracks merchandise that has been received into inventory, but for which no bill (vendor invoice) has yet been received. If a voucher has Payee information, during the AP read the voucher bypasses purchase clearing and is posted to the next batch.
- If the purchase clearing option is not selected, any voucher that contains an AP vendor but not a vendor invoice number and vendor invoice date is ignored.
- If using purchase clearing, prior to closing a period ensure that all vouchers created during the period are assigned to the appropriate vendor invoice.
General Purchase Clearing Rules:
| Action | Effect |
|---|---|
| Goods received without a vendor invoice | Credit to purchase clearing |
| Vendor invoice received on voucher in purchase clearing | Debit to purchase clearing |
| Goods returned to vendor without a vendor invoice | Debit to purchase clearing |
| Goods and vendor invoice received on voucher | No posting to purchase clearing |
| Goods returned to vendor with vendor invoice | No posting to purchase clearing |
Vouchers posted the first time (that do not include an invoice number) will:
- Credit the Purchase Clearing account with the sum of extended item cost.
- Debit Inventory by the sum of the extended item cost.
- Assign the PC flag to the voucher.
Vouchers posted a second time (with invoice number) will:
- Debit the Purchase Clearing account with the stored PC amount.
- Credit the Payable account with the voucher total.
- Debit the Freight account with the Freight amount.
- Debit the Fee account with the Fee amount.
- Debit the Tax account with the Tax amount.
- Credit the Discount account with the Discount amount.
- Debit the Inventory account with the sum of extended item cost less PC Total.
Process Flow (not using Purchasing Clearing)
Create an AP voucher.
Read the voucher.
Post the voucher to Accounting Link.
Import the voucher to QBFS.
| Account Name | Account # | Doc Debit | Doc Credit | Batch Debit | Batch Credi |
|---|---|---|---|---|---|
| Accounts Payable | Accounts Payable QB | 10 | 10 | ||
| Voucher Inventory | Inventory | 10 | 10 |
Process Flow - Using Purchase Clearing
Create a voucher with no invoice or date.
Read the voucher.
Post the voucher.
Import the voucher. to QBFS
| Account Name | Account # | Doc Debit | Doc Credit | Batch Debit | Batch Credi |
|---|---|---|---|---|---|
| Purchase Clearing | Purchase Clearing | 10 | 10 | ||
| Voucher Inventory | Inventory | 10 | 10 |
After the voucher is imported into QBFS, add the vendor invoice to the Voucher
Read the voucher.
Post the voucher.
Import the voucher to QBFS
| Account Name | Account # | Doc Debit | Doc Credit | Batch Debit | Batch Credit |
|---|---|---|---|---|---|
| Accounts Payable | Accounts Payable QB | 10 | 10 | ||
| Purchase Clearing | Purchase Clearing | 10 | 10 |
QuickBooks Accounts Receivable (AR) Settings
This section explains how to configure accounts receivable settings for QuickBooks.
Select Options > Preferences > QuickBooks > AR.
Enter Accounts Receivable accounts and other settings related to accounts receivable. QuickBooks requires that each A/R transaction type be assigned to an account. The A/R accounts you enter determine to which QuickBooks accounts A/R transactions will be posted. The accounts listed here must match accounts defined in QuickBooks. If necessary, return to QuickBooks to define such A/R accounts.
Sample Preferences > QuickBooks > Accounts Receivable settings:
 Refer to the following table for information on the available settings:
| Option | Description |
|---|---|
| Include what information in AR Receipt comment | Select to write information to the AR Receipt Comment field: None Comment 1/Store/Controller Comment 2/Store/Controller Voucher #/Store/Controller Cust PO/Store/Controller Year/Month/Store/Controller/Receipt # |
| Credit Limit | Customer credit limit. For A/R customers in Prism, the limit specified here will be assigned to the customers. |
| AR Account | The AR Account, Payment AR Account, and Return AR Account should be accounts assigned a Type of Accounts Receivable in QuickBooks |
| Return AR Account | The AR Account, Payment AR Account, and Return AR Account should be accounts assigned a Type of Accounts Receivable in QuickBooks |
| Payment AR Account | The Payment AR Account is used when Payments on Account is an accepted transaction. If payments are going to be accepted, an account must be specifically defined for this purpose in QuickBooks, typically Accounts Receivable. |
| Clearing AR Account | The Clearing AR Account serves the same role as an A/R Offset account. An Offset account is an account that is set up for elimination of a long or short position by making an opposite transaction, thus keeping Accounts Receivable balanced. An account must be specifically defined for this purpose in QuickBooks. |
| Auto-update customers | Select to automatically create an A/R customer update file when posting A/R transactions. The file containing the information for any new A/R customers will then be bundled with the transaction information file. (During import to QuickBooks, the customer information should be imported first so that it is in place before the transaction information is imported.). If enabled, there is no need to export and then import a customer update file separately. To retain control as to when A/R customer information is updated, do not select this option. |
| Identify customers by | In QuickBooks, customers are identified by their Customer Name. Customers exported from Prism can have their Customer Name configured in one of two formats. CUST_cust id or last name,first name_cust id. For example, say you had a customer in Prism whose name was Larry Smith and whose customer ID was 1198. Selecting the first format would import his Customer Name as CUST_1198, and selecting the second format would import his Customer Name as Smith, Larry_1198. Note: If the customer only has a Company Name in Prism, the last name,first name_cust id will appear as ",_1198" |
Using Accounting Link
Initialize/Update Customers and Vendors
There must be records in QuickBooks for A/R customers and A/P vendors before any transaction information can be posted for the customer or vendor. Because of the high chance of data input errors, don't enter this information into QuickBooks directly. Instead, use the Initialize feature. The Initialize feature creates a file that can be imported into QuickBooks. When the file is imported into QuickBooks, it creates records for all Prism A/R customers or A/P vendors that are flagged as Yes or Export. You can then edit the records in QuickBooks to enter additional information, if necessary.
Click Options on the Accounting Link main screen and select Initialize Customers or Initialize Vendors on the side menu. A progress bar displays to indicate the data transfer. When the process is complete, click OK.
Sample Accounting Link Options screen with Initialize Customers and Initialize Vendors buttons:

Update Feature
After Initialization, use the Update feature to update new or changed records customer or vendor records. A/R customer and A/P vendor information can be updated from the relevant transaction screens (customers from the receipts screen, vendors from the vouchers screen).
Sample Accounting Link Vouchers screen with Update Vendors button:

Read Data from Prism
The Read function imports selected information from Prism to the Accounting Link. All data is tracked and later posted by batches. Each batch is a collection of documents read into Accounting Link. A Batch includes one of the following document types:
- Transactions (Receipts)
- Vouchers
- Slips
- Memos
A batch can be read into Accounting Link in one of two modes: Preview or Marked.
Preview Batches
Create a Preview batch to review the contents of a batch before posting to QuickBooks. Preview mode enables checking a batch for errors before reading it in as Marked. You can use Preview batches for:
- Daily account reconciliation
- End of day procedures
- General review of data prior to a given audit period
To post the data in a Preview batch, re-read the data as a Marked batch.
Marked Batches
Marked batches are ready for posting. You cannot edit documents in a marked batch. Data editing must be done in Prism and then you must re-read the data into Accounting Link. You can change a marked batch to a preview batch.
Archived Batches
Archived batches are batches that have been posted to an accounting package but not yet purged from the system. You cannot edit documents within an archived batch. To be purged, a batch must be in "Posted" status.
Read Data Notes
- Transactions (receipts) and vouchers include return transactions and return vouchers, respectively. Information is read according to the selected transaction type and a specified date range.
- Imported data is stored in sequentially numbered batches. The same counter is used for all transaction types, giving each batch in Accounting Link database a unique identification.
- In addition to the Batch #, there is a sequentially numbered Batch ID located in the Batch Description that is transaction-type specific. The Batch ID can be modified to a more descriptive ID, thus making the batch easier to identify later.
- Within a type, individual batches can be created for each store.
- Data read in Marked mode can be unmarked if it is determined that corrections need to be made before the information can be posted. (Note: Posted batches can also be unmarked, but manual cancellation of the posted data in the accounting software must be done before the data is re-read and re-posted.)
Read Data
Click the Batches button on the top menu. Select Receipts, Vouchers, Slips, or Memos from the side menu.
If data has been previously read for the transaction type, the latest batch is displayed.

Click the Read button on the top menu.
The Read Batch screen is displayed.
- Select Preview or Marked in the "Read Batch as" drop-down.
- A default Batch Description is entered. The default description concatenates the following values:
- Adjust the date range, if needed. (If "Default to read yesterday's date" is selected, the Start Date is automatically updated to be the day before the End Date.)
- Click OK to begin the data import.

Refer to the following table for information about the available options in the Read Batch screen:
| Option | Description |
|---|---|
| Read Batch as | A batch can be read in one of two modes: Preview or Marked. The choice determines whether the related Prism transactions can be posted to the accounting software. Marked transactions are flagged in Prism and the batch can be posted. Preview transactions are not "marked" and the batch cannot be posted. To post the data, you must re-read the information in Marked mode. Preview mode allows you to check a batch for errors before reading it in as Marked. |
| Batch Description | A Batch Description is automatically assigned to the batch but can be edited. Batches for each transaction type are sequentially numbered. You may choose to retain this number or not. To edit the Batch Description, click in the field and make your changes. |
| Create single batch for each store | Select to have a separate batch created for each store's transactions (all with the same Batch Description). Enabling this option allows users to review and post batches on a store basis. |
| Document Date Range | Define the Start and End dates for the transactions you want to read. To specify the date range, do one of the following:
|
Inactive Fees, Discounts, UDFs
Accounting Link does not load inactive records for the following Prism record types:
- Fees
- Discount reasons
- Customer UDF fields
- Inventory UDF fields
Multiple Vouchers Sharing One Vendor Invoice
When you receive an order, the merchandise may arrive in several different shipments (shipping packages) over several days. However, the billing invoice lists the entire order with the total cost. This invoice information must now be used on all vouchers that are associated with the order. Since duplicate invoice information is not allowed in most accounting software, Accounting Link must combine the vouchers. When read into Accounting Link, the vouchers are displayed separately for review purposes. However, when posting the batch, Accounting Link combines any vouchers that have the same Payee, invoice date and invoice number. In effect, Accounting Link posts the information as if it were from one voucher. When combining vouchers, all value fields will be sum totals. Document information such as document number, date, due date, terms, etc., will be taken from the last voucher read. It is the responsibility of the user to ensure that all vouchers that reference a given vendor invoice are available for posting and that the Read date range encompasses the complete set.
Memos
Accounting Link only reads Quantity and Cost memos since those memos directly affect the value of inventory. Price memos are not read because price changes do not affect inventory value.
Note: In Prism Admin Console > Node Preferences > Merchandise > Adjustments, Preferences, if the Adjustments option Save Store Quantities for Price/Cost Memos is selected, Accounting Link may create multiple transactions from a Cost memo (one for any store affected). So, where one memo may be read by Accounting Link, more than one memo transaction may be displayed for the batch. By default, the preference is disabled.
Reading Vouchers with Prepaid or COD Terms
By default, Accounting Link ignores vouchers with Terms set to Prepaid or COD. To enable the reading of COD and Prepaid terms, add a "-COD" switch to the command line of the accounting link short cut for the specific SUB.
Correct:
C:\Program Files (x86)\PrismAcctLink\Sub_1\PRISMACCTLINK.exe -COD
Central Tenders
Accounting Link treats the following as if they are the same tender types:
- Central gift cards and regular gift cards
- Central gift certificates and regular gift certificates
- Central store credit and regular store credit
- Central store credit adjustments and regular store credit adjustments
Review a Batch
Batches can be viewed in List View or Form View.
- In List View, each row contains information for one transaction in a batch. Each transaction's information is displayed across the row in columns.
- In Form View, information is displayed as batch-specific, transaction-specific, or a combination of both. It all depends on the design of the form. If the information is transaction-specific, select the transaction while in List View and then change to Form View.
The search mode is based on how the information is currently sorted. For example, you can search for a particular transaction by sorting by transaction number (Doc #, which is the default sort column).
From the List View, sort the data by the column you want to search by clicking on the column header by which you want to search. Alternatively, while in the body of the List View, simply begin typing the characters of the entry you want to find in the Find field. The first match that is found is highlighted.
Since the column is sorted, use the down-arrow to move to the next match.
Click the Form button to view details about the batch in Form View.
Batch Screen Information
The batch screen includes information about the batch, the documents included in the batch, and the amounts posted to specific accounts. General batch information is displayed as well as information specific to each batch type.
Batch Info
Refer to the following table for descriptions of the Batch Info fields:
| Field | Description |
|---|---|
| Batch Description | An optional description of the batch. |
| Batch Type | The type of batch (e.g., AP, AR) |
| Batch # | The sequential number assigned to the batch. |
| Company | The name of the company. |
| Transaction Count | Most batch screens also display the number of transactions included in the batch |
| Out of Balance | If the Out of Balance checkbox is selected, the batch |
GL Accounts Info
Each batch screen has a table that lists how the documents in the batch impact the general ledger:
| Field | Descripton |
|---|---|
| Account # | The account number to which the amount is applied |
| Doc Debit | The amount the doc debits the GL account. |
| Doc Credit | The amount the doc credits the GL account. |
| Batch Debit | The amount the batch debits the GL account. |
| Batch Credit | The amount the batch credits the GL account. |
Receipt Batch - GL/AR Info
The Receipt batch screen has separate tabs for General Ledger and Commission information. Commissions are not used with QuickBooks and Prism.
Refer to the following table for information about fields on the Receipt Batch > GL/AR Info screen.
| Field | Description |
|---|---|
| Receivable Amount | The amount posted to the A/R account for the receipt. |
| Terms | The payment terms for the receipt. |
| Due Date | The date payment is due for the payment terms |
| Store | The store where the receipt was created. |
| Doc # | The document number assigned to the receipt |
| Doc Date/Time | The date and time the document was created |
| Cust ID | The ID assigned to the customer |
| Cust Name | The name of the customer listed on the receipt |
Voucher Batch Screen
Refer to the following table for information about the available fields on the Vendor Batch screen. (Not all fields available for all accounting software programs)
| Field | Description |
|---|---|
| Doc # | The sequential number assigned to the voucher. |
| Doc Date/Time | The date and time the voucher was created. |
| Vendor Code | The Vendor Code of the vendor from whom the merchandise was ordered |
| Vendor Name | The name of the vendor's company. |
| Invoice # | The vendor invoice number for the voucher. All Invoice #s be 10 digits or less. If the Invoice # is more than 10 digits, the invoice will not be posted |
| Invoice Date | The date the vendor invoice was created. |
| Terms | The payment terms for the voucher. |
| Payable Amount | The amount to be paid to the vendor. |
| Due Date | The date the payment is due. |
| Company | Company name. |
| Controller | The controller for the subsidiary. |
| Cost | The cost of the items on the voucher |
| Cost Disc | The discount applied to the cost of the voucher items. |
| Credit Total | The amount that will be credited to the account. |
| Debit Total | The total amount that will be debited from the account. |
| Disc Avail | The discount available for the vendor invoice total. |
| Disc Date | The date the discount is applied to the vendor invoice total. |
| Orig Cost | The cost before discounts. |
| Posted By | The employee who posted the batch. |
| Posted Date | The date the batch was posted to the accounting software |
| Price | The price of the voucher items. |
| Read By | The employee who performed the Read operation. |
| Return | If selected, indicates the voucher is a return voucher. |
| Store | The store where the voucher was recorded. |
| VIT | Vendor invoice total. |
| Read Date | The date the batch was read into Accounting Link. |
Slips Batch Screen
Refer to the following table for information about the Slip Batch screen.
| Field | Description |
|---|---|
| Store | The store which received the transferred items. |
| Doc No | The sequential number assigned to the slip. |
| Doc Date/Time | The date and time the slip was created |
| Controller | The controller for the current subsidiary |
| Credit Total | The amount that will be credited to the account. |
| Debit Total | The total amount that will be debited from the account |
| Posted By | The employee who posted the batch |
| Posted Date | The date the batch was posted to the accounting software |
| Read By | The employee who performed the Read operation |
| Read Date | The date the batch was read into Accounting Link |
Memo Batch Screen
Refer to the following table for information about the fields on the Memo Batch screen.
| Field | Description |
|---|---|
| Batch # | The batch number to which the memo belongs |
| Store | The store where the adjustment memo was created |
| Doc # | The sequential number assigned to the memo |
| Doc Date/Time | The date and time the memo was created |
| Controller | The controller for the subsidiary |
| Credit Total | The amount that will be credited to the account |
| Debit Total | The total amount that will be debited from the account. |
| Posted By | The employee who posted the batch. |
| Posted Date | The date the batch was posted to the accounting software |
| Read By | The employee who performed the Read operation. |
| Read Date | The date the batch was read into Accounting Link. |
Unmark a Batch
Unmark a Batch before it is Posted
If a Marked batch contains errors, you can unmark it. This changes the batch status to Preview and, in Prism, resets the accounting flags for the batch transactions. Correct errors in Prism, if necessary, and then do a Read process.
To unmark a batch:
Select the Marked (or Posted) batch that you want to unmark in either List View or Form View.
Click Unmark from the top menu.
A confirmation dialog is displayed. Select Yes to confirm the action.
Unmark a Posted Batch
A Posted batch can be unmarked but do so cautiously to avoid mistakenly re-posingt data. Typically, you only want to unmark a posted batch if the batch did not post correctly. To unmark a batch that did post correctly, manually adjust the related data in the accounting software before unmarking it and re-post the data - this includes any purchase clearing account postings that might be involved.
Delete a Batch
In Accounting Link preferences, you can schedule the deletion of batches as they reach a certain "age." When working with batches of any transaction type, you have the option to delete individual Preview and Posted batches for that particular transaction type. You can delete the current batch, or delete a batch stored in Active Batches or Archived Batches. Whenever a batch is deleted, it is flagged as purge-ready. (When you next enter Link preferences, Accounting Link may purge those purge-ready files from the database depending on preferences.). A Marked batch cannot be deleted. It must be unmarked, changing its status to Preview. Then, as a Preview batch, it can be deleted
Select the Preview or Posted batch that you want to delete.
Click Delete on the top menu. Confirm the deletion.
Batch Logs
Accounting Link maintains a log for each batch. This log can be viewed regardless of the state a batch is in. When the batch is purged from the system, so is its log file.
Select the batch that has a log file.
Click Batch Log on the side menu.
The log is displayed in the font you specified in Link preferences.
Using normal text editing, add any comments that you want to include in the log.
Right-click for a pop-up menu, then select the available action that you want and follow normal Windows procedures.
Batches Read by Store Share a Batch Log
If you create a single batch for each store during an import, and any errors occur for any of the batches, the errors are recorded in a single multi-store batch log. That batch log is "attached" to all of the batches that were created during that import. Situations where a log entry may exist but the batch does not:· If none of the transactions for a store could be read, no batch would be created for that store, but an error message would appear in the multi-store batch log.· If a batch has been deleted, its log will remain in the multi-store batch log. Only when the last batch of that group of batches is deleted is the multi-store batch log deleted.
Post a Batch
Batches can be posted in two ways:
- A single batch
- All active marked batches
When you post a batch, Accounting Link creates a file (with .IIF extension) that can be imported into QuickBooks.
The major features of the Post function are:
- Consolidate each batch as you prefer.
- Select the date to which you want the batch data posted.
- If any part of a batch cannot be posted, then none of the batch is posted.
- Post multiple vouchers for the same vendor invoice.
- Post vouchers that do not yet have a vendor invoice number or date to a Purchase Clearing account
- If a new customer or vendor is yet to be defined in the accounting software but is reflected in a batch transaction, Accounting Link can transfer the minimum amount of information necessary so that the batch can be posted.
Post a Batch
Select or display the marked batch that you want to post, and then click Post.
The Post Batch dialog is displayed. Select the Posting date. You can leave the date as displayed,or click the drop-down arrow to use a calendar to select a different date.
Select the consolidation level. Click OK to start the posting. A progress bar tracks the progress.
Sample Post Batch dialog:

About Consolidation Levels
General Ledger consolidation can make managing information easier. Accounting Link modifies how data is presented to the accounting software according to the consolidation level you select.
Refer to the following table for information about each consolidation level:
| Consolidation Level | Description |
|---|---|
| Transaction | Consolidating by Transaction posts a journal entry for each transaction within a batch. For example, five transactions results in five journal entries, one for each transaction. Data that posts to the same account for the same account type, for the same store, will be summed together. Thus, a single entry is made for each account for each store within a company. For example, for all of the transactions involving Store 001, all Cost of Goods data that posts to the same account would be consolidated to a single Store 001 entry. |
| Store | Data from the transactions in the batch is posted on a store basis. Thus, a single entry is made for each account type for each store. For example, Cost of Goods information that posts to the same account ID for the same store would be consolidated to a single store entry. |
| Company | Company Data from the transactions in the batch is posted on a company basis. All transaction data that posts to the same account ID for the same account type, for every store in the company, will be summed together. Thus, a single entry is made for each account type for the company. For example, for all of the stores in the company, all Cost of Goods information that posts to the same account ID would be consolidated to a single company entry. |
A/R, A/P Consolidations
A/R transactions are not consolidated. A/P transactions are consolidated if the Payee code, invoice number and invoice date on a voucher matches those of any other voucher read into the same batch. There is a single entry for the combined information.
Troubleshooting
Installing
If a user tries to install Accounting Link on a over an existing install, the user may receive a "could not copy" error message. To correct the problem, rename acctlink.ini.##### to acctlink.ini and then reinstall.
Reading
If there is trouble reading, verify the following:
- Is the date range of the Read correct?
- Are accounting modules defined in Accounting Link preferences?
- For A/R transactions, is there an A/R tender or fee? Is there an A/R customer?
- For A/P transactions, are an A/P vendor and the invoice # or invoice date on the voucher? (Exception: If Purchase Clearing account is enabled in Link Preferences)
Posting
If there is trouble posting, verify the following:
- Is the path to the company file correct?
- Are the stores for which you are posting defined the same in QuickBooks as in Prism? (e.g., Store 001 is not the same as Store 1.)
- Were customers updated? (receipts only)
- Were vendors updated? (vouchers only)
- Is there an A/R tender or fee?
- Is there an A/R customer?
- Are all vendor invoice numbers 10 characters/digits or less?
Updating
If there is trouble updating, verify the following:
- Are the export flags for A/R customers or A/P vendors set correctly?
QuickBooks Export/Import
Export Data from QuickBooks (Chart of Accounts)
Export the QuickBooks Chart of Accounts (COA) so that Accounting Link can access it when running functions like Check COA.
In QuickBooks, with the appropriate company file open:
- Select File > Utilities > Export.
- Select Chart of Accounts and click OK.
- Enter the filename. The file name must be in the format: COA_company name.iif. If the company name is not exactly as you have defined it in QuickBooks, Accounting Link will not recognize the file.
- Save the file in the default directory or Accounting Link will not be able to locate it.
Import Data (IIF Files) into QuickBooks
Accounting Link creates QuickBooks-compatible files (IIF files) that must be manually imported into QuickBooks.
Accounting Link automatically creates an IIF file that can be imported into QuickBooks when you:
- Post data
- Update customer information
- Update vendor information
- Save any changes to the Chart of Accounts
- Import customer/vendor information before importing receipt/voucher batch information. Then, if any transactions involve a new customer or vendor, the necessary information is already in QuickBooks. If auto-update is selected in Link preferences, the relevant update file is automatically included in the receipt/voucher batch.
To import IIF files, in QuickBooks with the appropriate accounting company open:
- Select File > Utilities > Import > IIF Files>
- A prompt is displayed. DO NOT CLICK "Import IIF". If you click the Import IIF button and try to import a file, the import will fail. Intuit Interchange Format is a proprietary file format used by QuickBooks that was updated in 2018. Accounting Link still uses the legacy format. To import a file generated by Accounting Link, choose the "mport using legacy method" option. A prompt is displayed asking you to confirm the import of IIF files using the legacy method.
- Browse to the file that contains the information you want to import. The file extension must be IIF. Select Open and import the file.
Upgrading Accounting Link
Make a backup before upgrading Accounting Link.
When upgrading Accounting Link, be sure to run the installer as administrator or there will be issues. Specifically, users will receive this error during installation and the Accounting Link INI files will be removed.

If that happens users must restore the backup files FOR EACH SUBSIDIARY INSTALLED and run the installer again, this time making sure to run it as admin.
Uninstall Accounting Link
Navigate to the C:\Program Files (x86)\Retail Pro\PrismAcctLink
Launch Uninstall.exe.
A message asks for confirmation that the user wants to uninstall Prism Accounting Link. Click Yes.
The uninstall wizard launches.
Follow the prompts to uninstall Accounting Link. When the uninstall is completed, a message is displayed. Click OK to close. A message confirms that Prism Accounting Link has been removed.
Click OK. Information about backups and log files is displayed. Copy the information for later use if needed.
Click OK.
Glossary
| Term | Description |
|---|---|
| Chart of Accounts (COA) | The chart of accounts is the list of accounts for each type of accounting information you want to track. For example, if you need to know how much money you spend on freight, you'll set up an account in the chart of accounts for Freight. Each account in the chart of accounts is assigned an account number. |
| General Ledger | Acts as the central bookkeeping for a given system and every transaction flows through this general ledger. The records remain as a permanent track of the history of all financial transaction since day one of the life of your company. |
| Accounts Payable (AP) | Used to help keep track of how much you owe, whom you owe and when payments are due. Traditionally associated with finances handled outside of the company. |
| Accounts Receivable (AR) | Used to keep track of who owes you, how much they owe and when payments are due to your company. (Cash currently not in house) |
| Cost of Goods | In accounting, the cost of goods sold describes the direct expenses incurred in producing/retailing a particular good or service. |
| Purchase Clearing | An account to track merchandise that has been received into inventory, but for which no bill has yet been received and, therefore, you cannot know how much to enter in QuickBooks as Payable. |