How to Install a Loopback Adapter for Retail Pro Prism
A Loopback adapter can be used to help maintain network stability when a host machine is having network connection issues with either a physical connection or virtual VPN connection.
The loopback adapter will help to maintain a local "virtual" network connection, which is needed for Retail Pro Prism to run.
How to install a Loopback Adapter
To install a Loopback adapter for Windows 10 please follow these steps:
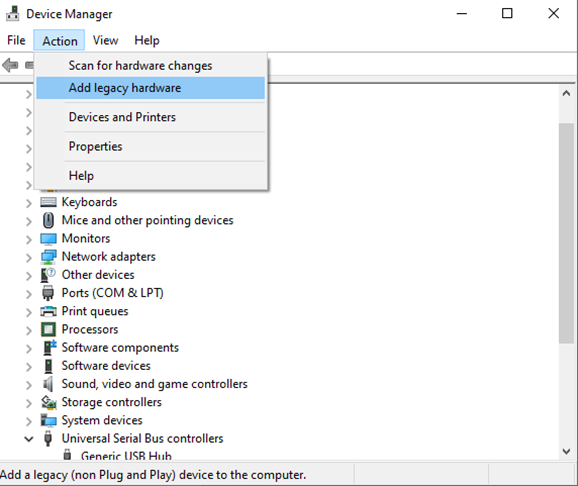
1. Right click on the Windows Start menu icon and select Device Manager.
2. Click on the Action menu at the top of the window and select "Add Legacy Hardware."

3. Select "Next."
4. Choose "Install the Hardware that I manually select from a list" and then click "Next."

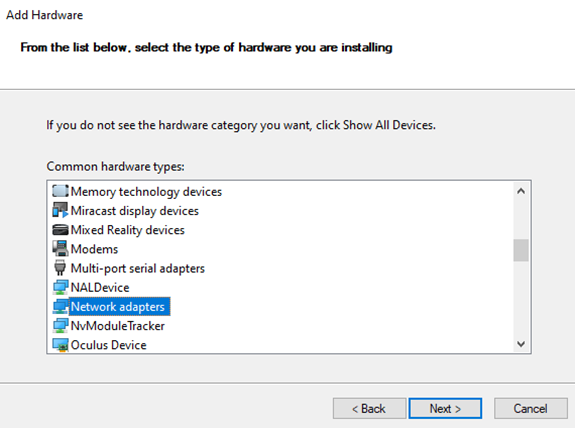
5. Scroll down and select Network Adapters from the common hardware types listed.

6. Select Microsoft as the manufacturer. Select the Microsoft KM-TEST Loopback Adapter card model. Then click "Next."

7. Click "Next." Then click "Finish."
Once the Loopback adapter is installed, we will have a virtual "always on" connection, so even if the physical network connection is lost, the virtual adapter will remain active.
How to ensure data is always passed through the network adapter
By adjusting the metrics for the network adapter, we can ensure data is always passed through it first. To adjust the metrics, follow these steps:
1. Right click on the Windows icon and search for "Control Panel."
2. In the Control Panel, select Network and Sharing Center
3. In the Network and Sharing Center, select "Change adapter settings" from the left-hand side.

4. Find the Loopback Adapter we installed, right-click and select "Properties."
5. Highlight Internet Protocol Version 4 (TCP/IPv4) and select "Properties."

6. On the General tab, select the "Advanced" button at the bottom.

7. In the IP Settings tab, uncheck "Automatic metric" and then enter 1 for the Interface metric.

8. Select "OK" for the next 3 prompts.
9. You can now close out of any open windows you have.