2.2.1.104 What's New
This topic has information about new features and functionality added in Prism 2.2.1.104
- Apache Upgrade to 2.4.55
- Default Operator for String Searches is CONTAINSStyle Details Redesign
- Item-Specific Values in Style Grid
- Add New Style in Advanced Item Lookup
- Filter Inventory by Price Range
- Stored Value Gift Cards
- Activate/Inactivate Multiple Items
- Lookup Vendor/DCS when Adding Item or Style
- See all stores in Style Details
- Price/Cost Change Warning
- Merge/Unmerge Zone permission for Physical Inventory Serial/Lot Number Entry on PI Sheets
- Resolve Serials/Lots on PI Sheets
- Search PI Sheet for Serial/Lot Number
- Doc Vendor column on POs and ASNs
- UDF 5-6 and AUX 1-8 on PO/Voucher/ASN Grids, Doc Designs
- Reverse a Voucher
- Wildcards (*) in Basic Item Lookup
- Email Receipt to Multiple Email Addresses
- Item Type field on Lot Number Entry modal
- Sublocation Information on Quantity Adjustment Memos
- PII Removal Tool
- Custom Tables
Apache 2.4.55
Prism 2.2.1 requires an upgrade to Apache 2.4.55. You must upgrade Apache before installing the Prism 2.2.1 update.
To upgrade Apache:
1. If you have installed additional web-based applications that use the Prism Apache server, then before uninstalling the current Apache:
- Back up the httpd.conf file from the \Apache\Conf\ directory
- Back up any custom modules that are in the Apache directories
2. Uninstall Apache 2.24.43 (used with Prism 2.2.0.x and earlier versions).
3. Restart the computer. Delete any registry keys associated with the old Apache.
4. Launch the Autorun.exe for 2.2.1 and install Apache 2.4.55.
After installing the new Apache:
- Restore any missing modules in the Apache directories
- Manually apply any missing elements from the backed-up copy of the httpd.conf file to the new httpd.conf file

Default Operator for String Searches is CONTAINS
DevTrack ID #25578
When searching for documents and records, the default operator for string value searches is now CONTAINS. Previously, the default was EQUALS. When using CONTAINS, any record that contains the string will be returned in the search results. It doesn't have to be an exact match (like when using EQUALS).
Sample Inventory Lookup showing default operator for Desc 1 is CONTAINS:

Style Details Redesign
DevTrack ID #24642
Inventory Style Details is now organized into multiple tabs, allowing more fields to be configured at the style level. Previously, Style Details was a single pane with relatively few fields that could be set at the style level. This change gives retailers greater control and flexibility when creating new styles.
Sample Price/Cost tab in Inventory Style View:

The following table lists the information on each tab in Style Details:
| Style Details Tab | Notes |
|---|---|
| Grid | This tab has the style grid showing sizes and attributes for the style. |
| General | This tab has DCS Name, Vendor Name, Description 3, Description 4, Department, Class, Subclass, Quantity Decimals, Max Discount %, Tax Code, Regional Inventory, Enforce Original Price Tax, and Skip Committed. |
| Price/Cost | This tab has Margin Percent, Margin Amount, Margin Amount with Tax, Markup %, Ext. Coefficient Amount, Ext. Coefficient Amount with Tax, Tax1 Percent/Amount, Tax2 Percent/Amount, Extended Tax Amount, Price Level grid. |
| Purchasing | This tab has various fields useful when reordering merchandise, including Order Cost, Orderable Date, Discontinued Date, Unorderable checkbox, Minimum Order Qty, Case Qty, Units per Case, Vendor List Cost and Trade Disc %. |
| UDF | User-defined fields for styles. |
| Misc | This tab has the same fields as the Misc tab in Inventory Item Details. This includes: Long Description, SPIF, Sellable Date, Created Date/Time, Text 1-Text 19, Length, Width, Height and loyalty fields. |
Notes
- Certain fields are only available in Item Details (e.g., Inventory Type, Serial Type, Lot Type and the Non-Inventory flag).
- The Purchasing Tab in the Styles user interface does not have Alternate Vendor information. This is by design.
Item-Specific Values in Style Grid
DevTrack ID #25458
In the Inventory style grid, you can enter item-specific values for style items. Here are two examples of how this feature is used when creating a new style:
- Enter OH Qty (i.e., zeros) in individual grid cells to create items in Inventory. When you save the stye, cells with a value will show as "created items."
- Enter a different Price (or other value) for individual cells in the grid. This enables different items within a style to have different Price or other value when needed.

Previously, any changes made within the style grid applied to all items in the style. New items inherit all grid values from the primary item, except the fields entered to create the item. Margin Amt and Margin % are read-only.
Track changes
With the Track changes checkbox selected (default=selected), when you change the value for a grid cell, upon clicking or navigating out of the field, the changed cell is highlighted in yellow.
Add New Style in Advanced Item Lookup
You can add a new style on-the-fly in Advanced Item Lookup (except at POS). This enables users to add new styles when needed when creating back-office documents. For example, when creating a receiving voucher, a user may use Advanced Item Lookup to search for a style and, if the style is not present, add a new style on the fly so the items can be received into Inventory. Previously it was only possible to add new items (not styles) in Advanced Item Lookup.
On a non-POS document (e.g., a purchase order), click the Advanced Item Lookup button (magnifying glass icon).
By default, Item Lookup is displayed. Click the Style Lookup button on the bottom menu.
Click the New button on the bottom menu.
Enter the new style information and save. After saving the style, click Return to Document. All defined items with a Doc Qty are added to the document with that quantity.

Filter Inventory by Price Range
DevTrack ID#20643
You can filter inventory by Price Range. To filter inventory by price, in Grid Formats preferences add the Price column in the "Allow Search By" Price area and save the changes.
After configuring Grid Formats preferences, the Price field will be available from the Search By dropdown in Inventory Lookup. When using Price as a Search By field, the operator is set to "Range" and cannot be modified. Enter the desired price range and then click the Search button.
Sample Inventory Lookup showing Price element set to "Range":

Prepaid and Stored Value Gift Cards for EFT
DevTrack ID #19372Prism 2.2.1 introduces the ability to create 'Gift Card - Prepaid' and 'Gift Card - Stored Value' inventory items to be used with EFT solutions that support Gift Cards, namely Global Payments (formerly Cayan) and Adyen. This enables retailers to sell (activate) gift cards as an inventory item. Previously, activating a gift card required listing the gift cards as a tender.
Add one or more inventory items with the Inventory Type field set to the appropriate value: Gift Card - Prepaid or Gift Card - Stored Value.
- In the case of prepaid cards, you will typically define a separate item for each card denomination used (e.g., $20, $50, $100) and enter a Price for each.
- In the case of stored-value cards, you will typically define a single item of type Gift Card - Stored Value with a Price of 0.00. The Associate will be prompted to enter the Price (amount) of the gift card item when it is sold at POS.
Note: Both prepaid and stored-value gift cards typically have the Tax Code set to a tax-exempt code.
Add Items with Inventory Type of Gift Card - Prepaid, Gift Card - Stored Value
To list gift card items on transaction, add items in inventory with the Inventory Type field set to the desired value: Gift Card - Prepaid or Gift Card - Stored Value.
Prepaid gift cards typically are set to a specific Price (and Cost). Stored-value gift cards typically have a Price (and Cost) of 0.00; the Associate will be prompted to enter the Price (amount) of the stored-value gift card when it is sold at POS. Both prepaid and stored-value gift cards typically have the Tax Code set to a tax-exempt code..
Sample Inventory record with Inventory Type field highlighted:

Gift Card Activation using Global Payments
1. List a gift card item on the transaction. If prompted, enter the Price (amount) of the card.
2. Click Tender Transaction.
3. Take payment for the card.
4. Click Print Update (or Update Only). This triggers the Activate Card prompt. The customer swipes the gift card through the Genius CED. If successful, the gift card value is added to the card, the receipt prints and a new transaction form opens.
Gift Card Activation using Adyen
1. List a gift card item on the transaction. If prompted, enter the Price (amount) of the card.
2. Click Tender Transaction.
3. Take payment for the card.
4. Click Print Update (or Update Only).
5. Control is sent to the Adyen PED. You will see a modal in Prism that says, "Waiting on Customer."
6. The customer swipes the gift card through the PED. The gift card value is added to the card. Control returns to Prism. The receipt prints and a new transaction form opens.
Add Value using Global Payments
If a gift card is swiped through the Genius device, Genius will detect if the card is active already. Only via CED will Global Payments automatically switch from activation to reload. If the user selects Bypass, it will be a pure activation request and if the card was already active, the user will see an error.
Adyen
For Adyen, when the card is swiped through the PED at any point, it will be a pure activation request. If the card was already active, users will see a message like "refused."
Notes
- All gift card types can only have Item Type of "Sale" on POS transactions.
- If the user changes the Item Type of one of the other items on the transaction that is not a gift card and chooses 'Apply to all items' or has the ‘Enforce single item type' preference enabled, all items are changed except the gift card items.
- The Gift Card number will be printed on the receipt (you may have to edit receipt designs to include the Card Number field). This is the Gift Card number that Prism receives back from the processor. It may be the whole number, ‘last 4' only or some other partial number.
- (Global Payments) You can activate or redeem gift cards using either the Genius CED or an encrypted card reader (must be a Global Payments-approved encrypted card swipe that supports both credit and gift cards).
- Gift Card items can only have a price greater than $0 when listed on a transaction. If you try to list a Gift Card item with a price of $0, you will receive an error.
- Gift Card items can only be listed with a quantity of 1. Attempting to list a Gift Card item with a quantity greater than 1 will result in an error.
- Gift Card Items have a Max Disc % set to 0 programmatically. This is (re-) set upon saving the item. Even when editing and attempting to change the percentage, upon saving the item, the percentage is reset to 0. If you create gift card items in 2.2.1 and forward, Max Disc % will be 0. If you already have gift card items in the system, those existing gift cards will be set to 100 upon installing the 2.2.1 update; we strongly urge you to reset the Max Disc % of these items to 0. The safest method is to inactivate any existing gift card items before installing this 2.2.1 update and then recreate the gift card items after installing the 2.2.1 update. In that way, you can be sure the Max Disc % will be zero.
Activate/Inactivate Multiple Items
DevTrack ID #21677
You can activate/deactivate multiple items with one button click, if all items are in the same state (active/inactive). Click the checkmark to select each item to be activated/inactivated and then click the Activate or Deactivate button.
Lookup Vendor/DCS when adding Item or Style
DevTrack ID #20145
When adding a new item or style to Inventory, use the "Departments" and "Vendors" buttons to navigate to the Departments and Vendor areas. Once in the Departments and Vendors areas, you can search for an existing record or add a new record if needed. Previously, the buttons were labeled "Create DCS" and "Create Vendor" and enabled users to add a new department or vendor but not search for existing departments or vendors. Users had to select an existing department or vendor from the DCS Code or Vendor Code dropdowns. This forced users to know the codes ahead of time. Now, users can search for the department or vendor by various criteria, making it easier to assign a record when specific codes are unknown.
Notes:
With the desired record highlighted in the Search results, click Return to Item to return to the item or style being created.
Sample new item screen with Departments and Vendors buttons:

Show all stores in Style Details
DevTrack ID #21236
When viewing Inventory Style Details - Grid, click the Show All Stores button in the grid footer to see quantities at other stores.
Clicking the Show All Stores button opens a modal that displays all the Subsidiary's active stores and OH quantities. The grid rows are grouped by the attribute or size name, depending on which one is shown along the left. You can expand any of these row groups to see each store's OH qty values.
Previously, to view OH quantities at different stores in Style Details, you had to switch to a different store and then could view only that store's quantities. This change saves time and makes it easier to compare quantities at stores.

Price/Cost Change Warning
DevTrack ID #25212
The behavior associated with the warning displayed when Cost exceeds Price has changed. When users create an item, no warning is displayed as Price and Cost fields are blank. Users will see a warning when changing Cost and Price if the other field has a value. Prism will only warn users once that Cost exceeds Price, until the Cost is less than Price again. If Cost exceeds Price after that, the warning will be displayed once until Cost is less than Price again and so on.
Sample "Cost is greater than price" warning:

Merge/Unmerge Zone permission for Physical Inventory
DevTrack ID #23023
The previous permission "Physical Inventory - Zone Merge/Unmerge" is now two separate permissions:
- Physical Inventory- Zone Merge: When set to Allow, allows the user to merge zones. When set to override, an override credential is required to complete the merging of the selected zone(s) and when it is set to deny, then the merge button is disabled.
- Physical Inventory- Zone Unmerge: When set to Allow, allows the user to unmerge zones. When set to override, an override credential is required to unmerge he selected zone(s) and when it is set to deny, then the unmerge button is disabled.
This change gives retailers greater flexibility in configuring employee security for zone PIs.
Serial/Lot Number Entry on PI Sheets
DevTrack ID #25023
Beginning with Prism 2.2.1, you can enter serial and lot numbers on PI sheets. Previously, there was no way to add counts for serial/lot items on PI sheets. To enter serial/lot numbers on PI sheets, first enable the feature in Admin Console > Merchandise > PI Sheet and optionally select whether to allow discrepancies.
Node Preferences > Merchandise > PI sheet preferences:

When a full-control serial or lot number item has its quantity modified on a Physical Inventory sheet in any way, a modal is displayed to scan/enter the numbers to be counted.
If you need to delete a number, select the number in the list and click the Delete icon.
Sample PI Serial Number Entry modal:

Resolve Serials/Lots on PI Sheets
DevTrack ID #25371, 25372
The Resolve Serials/Resolve Lots buttons on PI sheets allow you to view serial/lot numbers entered on the PI Sheet and resolve any discrepancies by adding or removing numbers.
Select a serial or lot item in the PI sheet item list to enable the Resolve Serials or Resolve Lots button.

Click the button to display a list of numbers from which numbers can be added/deleted.
Enter or scan a number and click Add to add, or select a number and click the trash can icon to delete.
Search PI Sheet for Serial/Lot Number
DevTrack ID #21328, 21329
You can now search a PI sheet for items with a specified serial or lot number. Previously, the search on PI sheets did not allow searching for serial/lot numbers.
On a PI sheet, click the Search By dropdown and select Serial Number or Lot Number.

In the displayed text box, scan or enter the desired serial or lot number and press

The item that has that number is displayed in the Search Results pane.
Additional fields added to Zone List Grid
DevTrack ID #24992
Additional fields have been added to the Zone List grid to make it easier to review zone counts:
- Total Counts: Displays the total scanned counts of the zone.
- Bad Scans: Items that were scanned and not recognized.
- Add Counts: Items that have been entered into add counts but not yet merged to the zone.
- Imported Qty: Displays item counts that are imported but not yet merged to the zone.
- Line Items: Displays the number of different items that were counted in the zone.
Doc Vendor column on POs and ASNs
DevTrack ID#20553
When searching for a multi-vendor item in Advanced Item Lookup, you can select the desired vendor in the Doc Vendor column. The results grid dynamically updates to show the selected vendor's Cost (Doc Cost), Price (Doc Price) and UPC or ALU. This enables you to easily select the desired vendor for multi-vendor items and view the key values for that vendor on the document.
The Doc Vendor drop-down is only enabled if the following are true:
- There are alternate vendors for the item (ALT_VENDOR table for the item has a length greater than 0)
- The item Doc Qty is 0
- The search value doesn't match an alternate record (as opposed to the primary)
Scroll to Display Doc Vendor Column
The Doc Vendor column is found at the far-right end of the scrollable part of the grid. Move the horizontal scroll bar to display the Doc Vendor column.
Sample Advanced Item Lookup results showing scrollbar moved to the right to display the Doc Vendor dropdown. Selecting a different Doc Vendor updates the Vendor Code, UPC and ALU for the item::

About the "Restrict to one vendor per PO/Voucher" preference
When the preference "Restrict to one vendor per PO/Voucher" is enabled, the preference is obeyed when adding items by search; however, when adding items to an ASN or Voucher by referencing the PO#, the preference is ignored (to handle those cases in which a PO was created before the preference was enabled and is being fulfilled after the preference is enabled).
POS, Transfer Orders, Slips, Memos, Price Manager, and Inventory
Searching for alternate UPC/ALU will always show the primary item
Purchase Orders, Vouchers, and ASNs
- Searching for Alternate UPC/ALU when "Restrict to one vendor per PO/Voucher" is enabled will:
- Show the primary item
For subsequent items, if a same vendor, alternate vendor for that item exists, the item will be automatically placed on the document, otherwise you will be alerted that vendors don't match
When "Restrict to one vendor per PO/Voucher" is disabled:
- The alternate vendor will be placed on the document
UDF 5-6 and AUX 1-8 on PO/Voucher/ASN Grids, Doc Designs
DevTrack ID #18963
You can add UDF 5-UDF 6 and AUX 1-AUX 8 columns to PO/Voucher/ASN grid formats and Doc Designer. Previously, only UDF 1 - UDF 4 were available for PO/Voucher/ASN grid formats and Doc Designer.
Sample Admin Console > Node Preferences > Grid Formats for Purchase Order showing Aux 1 - Aux 8 highlighted. Moving the columns from the Available list to the Selected list and saving will add the columns purchase order grids.

Reverse a Voucher
DevTrack ID #23796
You can reverse a receiving voucher using the "Reverse Voucher" button on the Options menu. Reversing a voucher creates a copy of the voucher, but the copy is a return voucher that removes from Inventory the received quantity from the original Voucher.
A permission called "Adjustments- Reverse Voucher" controls the ability of employee group members to use this feature.
In the VOUCHER table, the REVERSED_FLAG indicates if the voucher was reversed (0=not reversed, 1=reversed).
To reverse a voucher, search for and display the voucher and click the Options button.
On the Options button menu, click Reverse Voucher.
Voucher Options menu:

A confirmation is displayed explaining the Return Voucher created cannot be reversed.

Click OK to proceed.
(Optional) Enter a comment. Click OK.
Permission
A permission called "Vouchers - Reverse Voucher" controls the ability of employee group members to use this feature.
REVERSED_FLAG in VOUCHER table
In the VOUCHER table, the REVERSED_FLAG indicates if the voucher was reversed (0=not reversed, 1=reversed).
Wildcards (*) in Basic Item Lookup
DevTrack ID #25558
You can use a wildcard when entering a UPC or ALU in basic item lookup. Basic item lookup refers to scanning or typing a UPC or ALU in the Item Identifier text box on the document form (in contrast to Advanced Item Lookup which requires clicking the Search icon and entering search criteria). When a wildcard is included in basic item lookup, Prism will display a multi-match modal with the first 100 matches. This wildcard entry in basic item lookup works on POs, TOs, Slips, Memos, Vouchers, ASNs and Point-of-Sale transactions. Enabling the use of wildcards makes it easier to find and list items on documents.
Using a wildcard for UPC in basic item lookup:

Enabling the use of wildcards makes it easier to search for and locate items to list on documents.
Within the modal, you can change the field used to sort results and change the sort order if needed.You can use wildcards before or after part of a lookup identifier. In the example below, wildcards placed before and after "17" for UPC return the following results:

Email Receipt to Multiple Email Addresses
DevTrack ID #23697
Associates at POS can email receipts to multiple addresses. If Print Preferences are configured to enable the Email button in the Print dialog (enabled by default), in the "Email Address" text box of the Print dialog, enter each email address, separated by a comma. This makes it easy to send a copy of the receipt to as many people as needed. For example, you can send one copy to the customer and another to a spouse or accounting department.
Item Type field on Lot Number Entry modal
DevTrack ID #25399
The Lot Number prompt now includes the item type of each LN being requested. This is especially useful when the transaction include a mix of item types (sale, order, etc.)

Sublocation Information on Quantity Adjustment Memos
DevTrack ID #24923
When adjusting item quantities on adjustment memos, users can select the sublocation information.
If the Sublocations feature is enabled in preferences, sublocations are displayed in the bottom "Sublocation Quantity" pane. Enter the desired Adj Value for each sublocation (the Orig Value column shows the current quantity).
Sample quantity adjustment memo showing sublocation quantities:

Serial Numbers for Sublocation Item Quantities
When an Adj Value is changed for a serial number item, the serial number entry modal displays so you can add or remove numbers.
The item details for SN items has a Serial Numbers pane where the sublocation for each number is viewable.
PII Removal
The PII Removal Tool in the Prism Web TTK enables retailers to comply with customer requests to remove personal data from the system as specified under the General Data Protection Regulation (GDPR) requirements. GDPR is a European Union regulation on information privacy in the European Union (EU) and the European Economic Area (EEA).
The PII Removal Tool removes certain personally identifiable information (PII) and replaces it with generic data.
Requirements/Limitations
- Intended for use with one customer at a time. For example, a customer comes in and requests the data be removed. The tool is not meant for clearing all customers' data at a single time.
- Doesn't remove modified_by, created_by entries.
- The Customer SID is not touched.
To Remove PII:
Navigate to Prism Web TTK and log in.
Select Data Utilities > PII Removal Tool.
Select the field by which you want to search for the person and enter search criteria.
- When searching by Customer or Vendor Contact, you can search by First Name, Last Name, Email, and Phone Number.
- When searching by Employee, you can search by First Name and Last Name.
Click the Search button. A list of results is displayed to the right.

Select the desired record in the list of results.
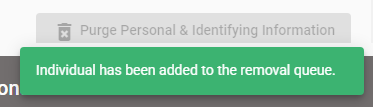
Click Purge Personal and Identifying Information.

A message indicates the customer's information is scheduled for removal.
Purge Resource Task
The Purge Resource Task runs daily by default. You can configure the task in Task Scheduler to run more or less often as needed.
Replication
The records updated by the PII Removal Tool are replicated as part of Core Resources. There is no option to select or deselect. The updated records will be sent to all stores with a connection to the POA. The updates will be made at the store locations per each stores scheduled Purge Resource Task.
Search for Employee by Last Name if Data was Migrated from V8 using DMT
If you used the Data Migration Tool to migrate data from legacy Retail Pro 8 to Prism, searches for employees must use the Last Name field only. This is because Retail Pro 8 employees use a single "Full Name" field. Upon export from V8 and import into Prism, the name is copied to the Last Name field in Prism and the First Name field in Prism is set to NULL. Newly created employees will have correct first and last name searches.
Custom Tables
DevTrack ID #25320
Developers of custom applications for Prism can use up to 10 "custom" tables (CustomData01..CustomData10) in the Prism database. The custom tables have the same default fields found in all Prism tables as well as the following columns:
| Column | Data Type | Notes |
|---|---|---|
| ClientID | NUMBER(19) | Identifies the client for whom the customization was created. |
| CustomizationID | NUMBER (19) | Identifies the customization. |
| CustomizationName | NVARCHAR2(255) | Name of the custom application. |
| ReferenceSID01 to ReferenceSID20 | NUMBER (19) | Reference to other tables. |
| Number01 to Number20 | NUMBER( 19) | Numbers. |
| Float01 to Float20 | NUMBER (16,4) | Float numbers, like price and cost. |
| Text01 to Text20 | NVARCHAR2 (2000) | Text fields |
| CLOB01 to CLOB20 | CLOB (5000) | Clobs |
| Date01 to Date20 | DATE | Date fields. |
| DateTime01 to DateTime20 | TIMESTAMP | Date with timestamp. |
| DateTimeZ01 to DateTimeZ20 | TIMESTAMP WITH TIMEZONE | Date with timestamp and timezone. |
Replication of Custom Tables
Replication resources are available to initialize or send the data with D-2-D replication.
The Custom profile includes the custom data tables so the custom data can be replicated separately from other data. Link the profile to the desired connection(s) to replicate any data in the custom tables.

Additionally, the regular Prism-to-Prism profile includes each custom data table as a separate resource that can be selected or cleared as needed:

LAST_ITEM_POS column in PO, T_ORD and VOUCHER tables
The LAST_ITEM_POS column stores the position (number) in the item list of the last item on the document. LAST_ITEM_POS is a required field.