Chapter 17. Adjustment Memos
Prism 1.14.7 User's Guide Chapter 17. Adjustment Memos PDF
Prism 2.4.1 User's Guide Chapter 17. Adjustment Memos PDF
Adjustment memos record changes to inventory quantity, price, and cost that are not recorded on receipts, vouchers, or slips. For example, if you manually edit an item's Price, Cost or OH Qty fields in Prism Inventory, a corresponding memo is created. If you manually edit Recording these changes is essential to maintaining accurate data. There are three types of adjustment memos: Quantity, Price and Cost.
This topic includes information about the following:
- Adjustment preferences
- Adjustment permissions
- New memo creation
- Memo fields
- Memo details
- Item details for memo items
- Special situations with Memos (e.g. Price Manager Price Plan Owner)
- Sublocations and quantity adjustment memos
- Printing tags for memo items
About Quantity Memos
Quantity memos change item quantities for a selected store. The currently active price level in inventory is used to populate price-related fields. If the store uses price-based stores, then the appropriate price level for the selected store is used. By default, users are not able to enter a negative quantity on an adjustment memo. To enter a negative quantity on a memo, the preference "Allow Negative Quantities on Memos" must be selected.
About Cost Memos
Cost memos record the changes in inventory Cost for a selected group of items. Cost memos are always applied to the entire company, rather than to a particular store.
About Price Memos
Price memos change price for the entire subsidiary. Price memos record the price changes in one particular price level for the listed items. Multiple memos are required if you want to change prices in more than one price level. In some cases, Prism creates adjustment memos automatically, such as when a receiving voucher updates inventory costs. If an activity changes both quantities and prices, then Prism generates both a quantity memo and a price memo. You can also create memos manually to correct mistakes.
Adjustment Memo Permissions
| Permission | Description |
|---|---|
| Adjustment Memo - Allow bypass of full control serial number entry | When a user tries to update a memo before all numbers for full-control items have been entered, a prompt is displayed: Not all full control serial numbers have been entered. Continue with update? Only users who belong to a group that is assigned the "Allow bypass of full control serial number entry" permission can continue with the update. |
| Adjustment Memo - Allow bypass of full control lot number entry | When a user tries to update a memo before all numbers for full-control items have been entered, a prompt is displayed: Not all full control lot numbers have been entered. Continue with update? Only users who belong to a group that is assigned the "Allow bypass of full control lot number entry" permission can continue with the update. |
| Adjustment Memos - Create Cost Memo | Allows group members to create a cost adjustment memo |
| Adjustment Memos - Create Price Memo | Allows group members to create a price adjustment memo. |
| Adjustment Memos - Create Qty Memo | Allows group members to create a quantity memo. |
| Adjustment Memos - Edit Former | Allows group members to edit a former memo. |
| Adjustment Memos - Print Memo | Allows group members to print a memo. |
| Adjustment Memos - Reverse Memo | Allows group members to reverse a memo. |
| Adjustment Memos - Unhold Memo | Allows group members to unhold a memo. |
| Adjustment Memos - Update Memo | Allows group members to update a memo. |
Adjustment Memo Preferences
The following preferences are available in the Preferences & Settings > Merchandise > Adjustments area.
| Preference | Description |
|---|---|
| Tax Area 1, Tax Area 2 | This enables you to select a specific tax area for each of two tax areas. This feature is important for retailers in a multi-tax VAT environment because it means that when a retailer changes an item price or cost, the resulting adjustment memos will correctly calculate price with tax. |
| Require Comments on Memos | When you select Require comments on memos, Retail Pro requires you to enter at least one character in the Comment field on a memo. |
| Save store quantities for Price/Cost memo | This preference enables retailers to store item on-hand quantity information on price and cost memos.
|
| Allow negative quantity in Quantity memo | If selected, users can enter a negative quantity on a quantity adjustment memo. If not selected, negative quantities are prevented. |
Adjustment Memo Reasons preferences
By default, users must enter a reason when creating adjustment memos. Define the reasons that will be available for selection in Node Preferences > System > Reasons and Notes. Select "Adjustments" from the drop-down menu. At the top of the screen are settings for requiring reasons and setting a default reason for each memo type. Below that, in the Adjustment Reasons table, add or edit reasons for adjustment memos.
| Preference | Description |
|---|---|
| Require Comments on Memos | If selected, users must add at least one comment to the memo. To add a comment, navigate to Memo Details on the memo. |
| Require Cost Adjustment Reason | If selected, users must select an adjustment reason to update a cost adjustment memo. |
| Default Cost Reason | If a default cost reason is selected, the reason will be entered on new cost memos (can be edited). |
| Require Price Adjustment Reason | If selected, users must select an adjustment reason to update a price adjustment memo. |
| Default Price Reason | If a default price reason is selected, the reason will be entered on new price memos (can be edited). |
| Require Quantity Adjustment Reason | If selected, users must select an adjustment reason to update a quantity adjustment memo. |
| Default Quantity Reason | If a default quantity reason is selected, the reason will be entered on new quantity memos (can be edited). |
Sample Node Preferences > System > Reasons and Notes: Adjustments:

New Memo (Manual Creation)
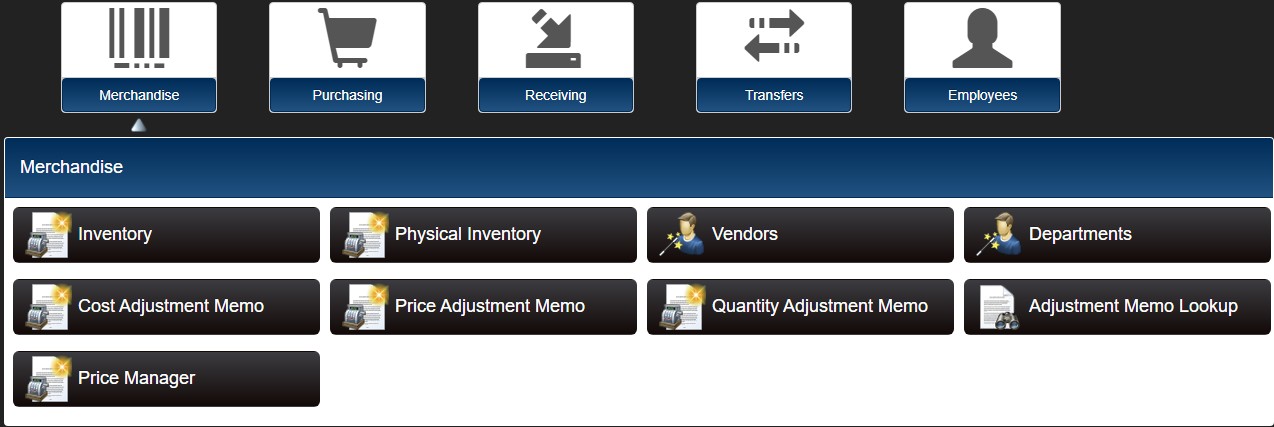
- Navigate to Store Operations > Merchandise.
- Click the appropriate button for the type of memo you want to create.
- A new adjustment memo form opens. List the items being adjusted by scanning the item barcode or typing the UPC. For each item, enter an adjusted value (i.e. "Adjusted Cost").
- (Optional) Add any needed Comments to the memo. To add Comments, click the Memo Details button. Click the Plus Sign icon and type the comment text.
- Update the memo by clicking Print/Update or Update Only. A confirmation is displayed. Click OK to proceed.
Sample Adjustment Memo

Popup entry option for listing items
If you select the Popup Entry checkbox, then when you scan or type an item identifier, a popup dialog is displayed for entering the adjustment value (quantity, price, or cost). If the popup entry checkbox is cleared, users must navigate to the correct column and type the value (or use Item Details).
Serial/Lot Numbers on Adjustment Memos
The process of entering serial and lot numbers on quantity adjustment memos is different from other documents. This is because the user could be adjusting the quantity up or down. In addition, the user interface for entering serial numbers works differently than for lot numbers. This section will show both.
Entering Serial Numbers on Quantity Adjustment Memos
1. Scan the item's UPC to list it on the adjustment memo.
2. Enter the Adj Qty and press
3. Prism opens up Item Details with the Serial Numbers tab displayed. There will be one or more blank rows based on the difference between the Orig Qty and Adj Qty on the memo item list for that serial number item. The Adj Qty for each row is set to "1" or "-1" based on whether the quantity is being adjusted up or down and cannot be changed.
4. Scan or type a serial number. You can search for a number by clicking the Search button (magnifying glass). The Note field is optional.
5. Click OK after you have added numbers for each quantity being adjusted.
Sample Serial Numbers tab in Item Details with a line for each Adj Qty:

Searching for a Serial Number
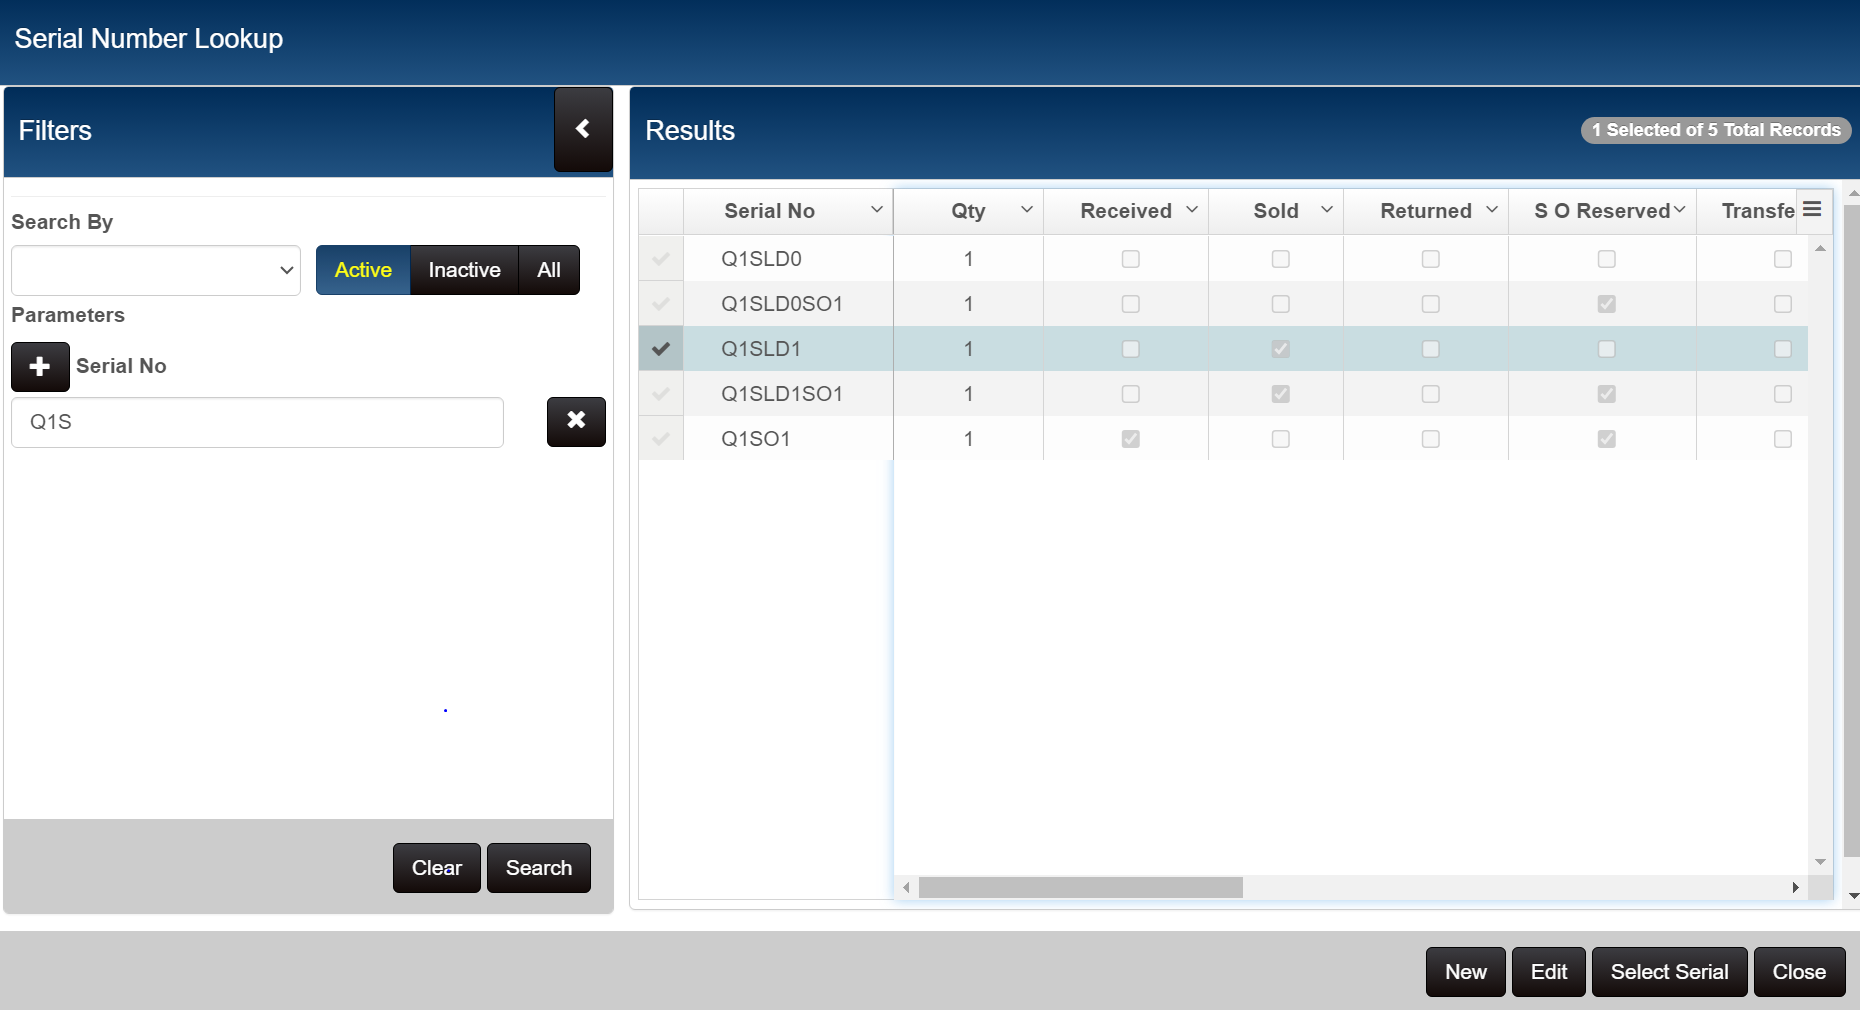
If you click the Search button, a screen for selecting and entering filter criteria is displayed. Currently the only available filter element is Serial No. The operator is not shown but it is set to CONTAINS and cannot be changed.
Enter or scan all or part of a number and click Search.
In the Results list, select a number and then click the Select Serial button.
Sample Serial Number Lookup modal for quantity adjustment memo with number selected and the "Select Serial" button enabled:
Entering Adjusted Quantity on Details tab
On the Details tab, users can enter the Adjusted Quantity for the item. Users can then navigate to the Serial Numbers tab and enter the number(s) for the units being adjusted.
Entering Lot Numbers on Quantity Adjustment Memos
When entering lot numbers on adjustment memos, instead of a separate line for each Adj Qty (like for serial numbers), you will see a single line set to the total Adj Qty. Users must enter one number at a time and manually adjust the Adj Qty to "-1" or "1" (based on whether decreasing or increasing item quantity) in order to enable the UI element that allows for entry of another number.
In the sample memo below, the Orig Qty is 30 and the Adj Qty is 28 so item quantity is being decreased by 2.
Sample quantity adjustment memo that decreases item quantity by 2:

When you enter an Adj Qty different from the Orig Value and press the

This example decreases item quantity, so manually change the Adj Qty to "-1" and press
Click the Add button. Another row opens. Enter another number and make sure the Adj Qty is -1 if decreasing quantity (or "1" if increasing quantity).

Repeat the process until the Entered Qty values are balanced.
Package/Kit Items on Adjustment Memos
You can list kit items on memos but not package items (which have no inventory quantity). To adjust a package item, you must adjust the individual component items.
Memo Fields
| Field | Description |
|---|---|
| Original Cost | The cost before the adjustment. |
| Adjusted Cost | The cost after the adjustment. |
| [Value] Difference | Cost Difference Price Difference Quantity Difference Shows the difference between the Original value and the Adjusted value. |
| Original Price | The price before the adjustment. |
| Adjusted Price | The price after the adjustment. |
| Original Quantity | The quantity before the adjustment. |
| Adjusted Quantity | The quantity after the adjustment. |
| Memo Details | |
| Memo No | Memo number. |
| Memo Source | Source of the memo (e.g. PI Update). |
| Memo Type | Type of memo: Price, Cost or Quantity |
| Source Doc No | Sometimes memos are created as a result of another document being updated. For example, updating a voucher may cause a memo to be generated. This field will list the number of the document that resulted in the memo being created. |
| Created Date | Date the memo was created. |
| Last Edit Date | Date of the most recent edits to the memo. |
| Post Date | Date the memo was posted to the HQ database. |
| Memo Status | Current Memo Status (e.g. Held,) |
| Associate | The user making the adjustment memo |
| Store | The Store where the adjustment is made. |
| Price Level | On Price Adjustment Memos, the Price Level whose price(s) will be adjusted. |
| Reason | The reason for the adjustment. By default, a Reason is required on memos. You can control this via the "Require Reason" preference in Node Preferences > Merchandise > Adjustments. |
Memo Details (Add Comments)
To view or add comments, tap or click the Memo Details button.
Click the Add button to add a new comment.
Click the check mark. The comment is saved and added to the list.
Click Close to exit Memo Details.

Item Details for Memo Items
To view or edit item information, including the "adjusted" values for each item, click the check mark on the left of the item grid and then click the Item Details button. The fields that are available for editing will vary depending on the memo type. Make edits as needed and then click OK to save the changes and close Item Details.

Default Information on Memos
Store on Memos
The Store on Quantity memos is the Default Store selected for Quantity Memos in System Preferences. The Store on Price and Cost Memos is always set to CMP (Company).
Associate on Memos
The current logged-in user is entered in the Associate field and cannot be changed.
Adjustment Memo Reasons
Define Adjustment reasons in Prism Node Preferences > System > Reasons and Notes. When manually creating an adjustment memo, users must by default select a Reason. If the "Require" preference is cleared for a memo type, then the Reason is optional.
Sample adjustment memo reasons:

Tax Area on Memos
In Prism Preferences, you can assign specific tax areas for adjustment memos. This feature is important for retailers in a multi-tax VAT environment because it means that when a retailer changes an item price or cost, the resulting adjustment memos will correctly calculate price with tax. Note: The Tax Area preferences are not available at the Global level. You must first select a Subsidiary to edit the preferences.
- In Prism preferences, select a Subsidiary and then navigate to Merchandise > Adjustments.
- Select the tax areas to use when calculating price with tax on price/cost memos for Tax Area 1 and/or Tax Area 2, as needed.
- Save the changes.
Adjustment Memo Lookup
You can access Adjustment Memo Lookup via the Store Operations menu or via the Options button on the memo form.
- Select Store Operations on the Prism menu.
- Click the Adjustment Memo Lookup button.
- Adjust the date range, if necessary. The default date range is the first of the month to the current date.
- Enter filter criteria: Memo Number, Memo Type, Reason, Memo Status, Memo Source, Store, or Associate. Click the Search button. A list of matching memos is displayed.
- Select the check mark for the memo you want to view. Click the View button.
Memo Status
When looking up memos, you can filter the results by the Memo Status field. The following table lists the possible Memo Status values.
- Changed When you edit a memo, the status is set to Changed.
- Cancelled When you cancel a memo, the status is set to Cancelled.
- Pending When you start a new memo, the status is set to Pending.
- Updated When you update a memo, the status is set to Updated.
- Reversed When you reverse a memo, the status is set to Reversed.
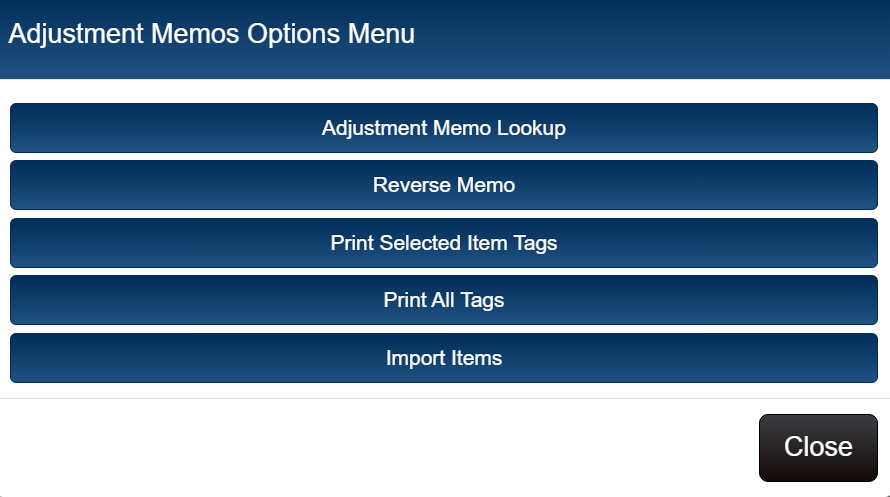
Options Menu
The Options Button enables users to easily access the following adjustment memo tasks:
- Adjustment Memo Lookup
- Reverse a Memo
- Print Selected Item Tags
- Print All Tags
- Import Items
Print Tags for Memo Items
The Options menu for adjustment memos includes two options for printing tags: Print Selected Item Tags and Print All Tags.
Sample Options button menu for adjustment memos:
| Option | Notes |
|---|---|
| Print Selected Item Tags | Print tags for the currently selected item only. |
| Print All Tags | Print tags for all items on the document. |
The Print Tags modal for selecting the quantity of tags to print includes the following options:
| Option | Notes |
|---|---|
| On Hand Quantity | Print tags for the current OH Qty in Inventory (either for the selected item or all items on the memo). |
| Document Quantity | (Quantity memos only) Print tags for the document quantity (Adj Qty) entered on the memo (either for the selected item or all items). |
| Copies | Print the specified number of copies entered in the Qty Multiplier field. |
Sample Print Tags modal showing options for selecting On Hand Quantity, Document Quantity or Copies:

Print new Price Tags for Items on Price Memo
To print tags for the OH Qty for all items on a Price memo:
1. Click the Options button and select Print All Tags.
2. In the Print modal, select On Hand Quantity and print. The number of tags printed for each item will be equal to the item's OH Qty.
API RPC method: printtags
When calling the backoffice printtags RPC method, there is a MaxTags parameter which limits number of printed tags. By default, MaxTags is set to 5000.
Hold a Memo
You can place a memo on hold, if necessary. To include held memos when looking up a memo, select "Pending" in the Memo Status field when filtering in Adjustment Memo Lookup.
1. On a memo in progress, click the Hold button.
2. To unhold the memo, click the Unhold button if the memo is still displayed.
3. If the memo is not displayed, use Adjustment Memo Lookup to find and display the memo. When searching for the memo, if the Held checkbox is selected, Held documents will be included in the search.
When you find the memo, click the View button and then edit the memo, if needed.
Reverse a Memo
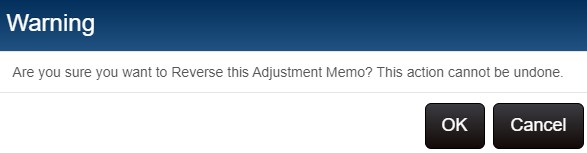
Use Adjustment Memo Lookup to find and display the desired memo. Click the Options button and select Reverse Memo. A warning is displayed, explaining the action cannot be undone. Click OK to continue with reversing the memo.
Copy a Memo
A fast, easy way to create a new adjustment memo is to copy an existing memo that offers a close match. You cannot change the memo type when copying a memo. For example, you cannot create a cost memo by copying a price memo.
- Use Adjustment Memo Lookup to find and display the desired memo.
- Tap or click the Copy button.
- Make any needed changes and then save the memo.
Replication of Memos
To replicate memos, make sure the ADJUSTMENTS resource is selected in the resource list for the profile.
Serial and Lot Number Items on Adjustment Memos
If you try to adjust the quantity of a serial or lot number item, a screen is displayed for completing the process. If the new quantity is more than the original quantity, you must add the appropriate number of new serial numbers. If the new quantity is less than the original quantity, you must remove the appropriate number of existing serial numbers.
The user interface is slightly different depending on whether you are creating a quantity adjustment memo or manually adjusting the item's OH Qty in Inventory.
First, let's look at the UI on a quantity adjustment memo. In the screenshot below, the first item in the list is a full-control serial number item. In this case, the Adj Value (21) is one more than the Orig Value (20).

When the user enters the Adj Value that is different, a screen like the one below is displayed. At the top are two panels. One shows the Old Quantity, Adjusted Quantity and the Quantity Difference. The other panel shows how many serial numbers have been added or removed. As you add or remove numbers, the Inserted SN Quantity and Deactivated SN Quantity are updated and the Quantity Difference is adjusted.
In this case, the Quantity Difference is 1, so we need to add one additional serial number. In the Insert Serial Numbers area, click the plus sign icon. The UI changes to include an area to enter the number being inserted (or removed). Type the number. Click OK.

Sublocations on Quantity Adjustment Memos
(Prism 2.2.1 and later) To move items from one sublocation to another, including allocating the Primary quantity among user-defined sublocations, the user must create a quantity adjustment memo. When creating a quantity adjustment memo for an item, the user enters an Adj Value for individual sublocations for each item on the memo. It is up to the user to enter the correct Adj Values to account for all quantities. For example, to move all quantities from the Primary to a Backroom sublocation, the user must zero out the Primary sublocation quantity and enter the equivalent quantity for the Backroom.
Move item quantities between sublocations:
Navigate to Store Operations > Merchandise > Quantity Adjustment Memo.
Start a new quantity adjustment memo. List the item(s) that will have OH Qty adjusted.
Select an item in the item list.
Scroll down to the Sublocations Quantity pane below the item list.
A list of sublocations and quantities is displayed.
The Orig Value displays the current OH Qty for the item in the sublocation.
Enter the desired new OH Qty value in the Adj Value column.
Initially, all item quantities will be in the Primary sublocation.
Enter an Adj Value for other sublocations and deduct the quantity from the Primary.
When moving items around, the user typically wants the quantity to stay the same; therefore, the total of the sublocation Adj Values should be monitored to match the item Orig Value.
Advanced Item Lookup on Adjustment Memos
- Defining a Document Cost for a newly created item in advanced item lookup within a cost memo will add that item to the Cost Memo
- Defining a Document Price for a newly created item in advanced item lookup within a price memo will add that item to the Price Memo.
- Defining a Document Qty for a newly created item in advanced item lookup within a qty memo will add that item to the Qty Memo