Allocation Patterns
Allocation patterns can be used with purchase orders and transfer orders. Allocation patterns make it easy to allocate ordered merchandise among multiple stores. An allocation pattern specifies the relative quantities to be ordered for each store. Prism then assigns quantities for individual stores based upon the total quantity ordered. Prism does this by first summing the quantities entered in the allocation pattern for all stores and determining what percentage of the total has been allocated to each store. Prism then multiplies each store percentage by the total item quantity to determine the quantity of that item to be ordered for each store. If you change the quantity on the PO, the quantities ordered for each store will be recalculated according to the allocation pattern.
An allocation pattern specifies the relative quantities to be ordered for each store. If the Total Order Quantity is a multiple of the total quantity in the pattern (e.g. 36), then the pattern is applied as shown below, with each store receiving the specified relative allocation. If the total quantity ordered is not a multiple of the allocation pattern (e.g. 21), the remaining items are allocated to the stores one at a time.
Department Allocation Patterns
You can also assign a default allocation pattern to each department. If you assign a default allocation pattern to a department, that pattern will be automatically applied to all items from that department as the items are listed on the PO. However, if you want, you can select a different allocation pattern when making a PO.
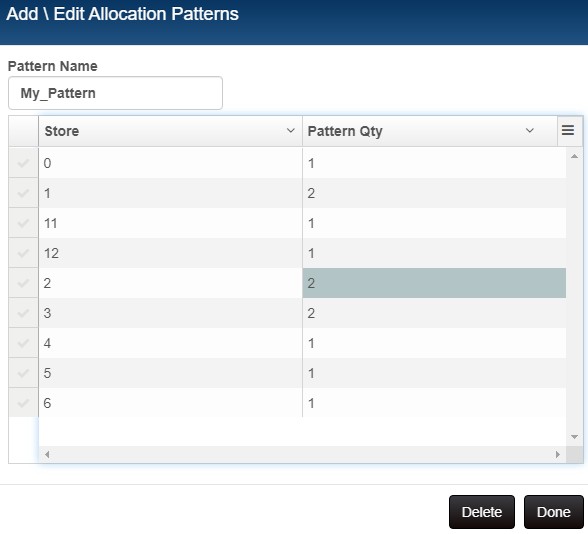
New Allocation Pattern
1. On a purchase order or transfer order, in the item list area click in the Apply Allocation Patterns dropdown and select New Pattern.

2. Enter a user-friendly name for the pattern.
3. Enter relative order quantities for each store.
4. Click Done when finished.
Sample Allocation Pattern modal:
Apply Allocation Pattern
When applying an allocation pattern, you can apply the pattern to the selected items, the entire document, or the entire style. To apply an allocation pattern to selected items, first select the check mark icon on the left side of the item grid. To apply a pattern to an entire style, select the check mark icon for any member of the style.
1. Start a new PO and list the items being ordered.
2. Select the check mark icon for individual items as needed.
3. Select the desired pattern from the Apply Allocation Pattern dropdown.
4. Click the check mark icon.
5. Select how the pattern will be applied: Selected Items (each item with its check mark icon selected), Entire Document, or Selected Styles (applied to each item in the same style as the currently selected item). The pattern is applied to the PO. Complete the rest of the PO.

Edit Allocation Pattern
If necessary, you can edit the allocations in an allocation pattern. You can add, edit, or delete the allocations specified in the pattern.
1. Select a Pattern in the dropdown. Click the Pencil icon.
2. Edit the Pattern Name and/or Pattern Qty for individual stores. You can also delete an entry, if necessary.
3. Click the Done button when finished.
Showing/Hiding Allocations
The Show Allocation button is a toggle that shows/hides the item allocation grid.
| Button | Description |
|---|---|
 |
This button indicates that allocations are not currently displayed. If you click the button, allocations are displayed in the bottom part of the screen, below the item list. |
 |
This button indicates that allocations are displayed. Click this button to hide allocations. |
Searching for a Specific Store's Allocation in the Item Allocation Grid
You can search the grid for a particular store's allocation. This is especially useful when there are a large number of stores. Simply type in the Store Name or Store Number. The list is filtered automatically as you type or delete characters. This enables you to easily view the allocations for any store. Alternatively, you can use the Up and Down arrow buttons to scroll up and down the list of store allocations.