EFT with Adyen
Disclaimer: Adyen is available for use with Retail Pro outside the U.S. only.
This topic has information about how to configure Prism for use with Adyen as the EFT gateway:
- Configure the Adyen web portal and Prism configuration settings related to Adyen
- Tender by Credit, Gift Card and Debit Card at POS
The Adyen Personal Engagement Device (PED) sits on the retail countertop and connects to the POS via the local LAN. The PED accepts all traditional swiped credit cards, PIN debit cards, and gift cards. All signatures are captured directly on the CED screen and stored digitally in the Adyen Database (not in Prism). Prism connects to the PED via the Terminal API. Before you start, make sure you have your login for the Adyen account so that you can configure your PEDs. Without your login, you will not be able to configure or connect to the PEDs via Prism.
Basic Steps
- Connect the PEDs to the LAN and download the latest software updates.
- Log in to the Adyen web portal and configure PEDs.
- Download updated config to PEDs.
- Add a new customization for Adyen in Admin Console > Customizations.
- (at the appropriate level in preferences) Select Adyen as the EFT Provider in Admin Console > Preferences & Settings > Node Preferences > Transactions > Tenders > EFT Server Configuration.
- Configure HAL settings at each workstation that has a PED. When configuring HAL settings, you must enter "base" settings. Later in this document you will find a sample that you can copy and paste.
- Restart the Proxy.
- Edit Prism Adyen Configuration settings.
- Right-click Proxy icons and select Reload HW Config (or restart Proxy).
- Run transactions in Prism. Review the transactions on the Adyen web site.
Minimum Required Prism Version
To use Adyen with Prism, you must be on Prism 1.14.6.1177 or later
Minimum Required Adyen Software Version
For use with Prism, the minimum required Adyen software is 1.48.6.
Supported Hardware
The PED connects to your local network and communicates with Prism via the Terminal API; therefore, ONLY devices that support the Terminal API are supported. This includes the Verifone M400, V400, P400, P400 Plus, E285 and VX820 Duet
Connect PED to LAN and Update Software
Connect the PED to the LAN and 1) check for software updates and 2) verify the PED's assigned IP address (IP Address is needed later in the configuration).
Check for Software Updates
Check the latest software version on the Adyen web portal and compare it to the version on the PED.
On the Adyen web portal:
When you first go into the Point of Sale area of the Adyen web portal, you will see a list of PEDs. Among the information listed for each PED is the Software version.
Alternatively, click Terminal > Advanced. [Network tab???]. The Configuration Version is listed.
On the PED:
Connect the PED to the LAN.
Go into the Menu. Click View Configuration. If the version number is lower than the version number on the Adyen Web Portal, click Update Config.
Verify PED IP Address
When you connect the PED to the LAN, the DHCP server will lease an IP Address to the PED. You will need to enter the device's IP Address into the Prism Adyen Configuration screen.
To find the PED IP address:
Adyen Web Portal - Configure PEDs
Log in to the Adyen web portal.
Select Point of Sale > Terminals from the top menu. You will see a list of PEDs with information about the Status, Device model and Software version.
Click on the PED that you want to work with.
When you click on one of the PEDs, you will see a detailed view of the PED's information.
The lower part of the screen has a set of tabs. Click the Settings tab. The following elements in Point of Sale > Settings are relevant to Prism configuration via the Prism Adyen Configuration screen.
- Serial number
- View decrypted properties button (used to access the Key ID and Passphrase)
Sample Terminal > Point of sale > Settings:

Serial Number
The serial number field is shown in two places on the Point of Sale screen. In the upper-left corner is the device model followed by the serial number. In the example above, the device is a Verifone M400. The part after the dash is the serial number. The serial number is also displayed above the Terminal ID, where it is displayed in nnn-nnn-nnn format. When entering the serial number in the Prism Adyen Configuration screen, copy the Device-Serial from the top left of this screen into the Prism Adyen config screen's appropriate field.
View decrypted properties button
Click the View decrypted properties button. You are now on the Terminal API tab:
Enable Terminal API: Make sure this is set to ‘Yes.'
Enable DCC: You can leave this set to ‘No.' If set to ‘Yes,' Dynamic Currency Conversion will be used at the Terminal instead of via your bank. See the "Dynamic Currency Conversion" note for details. If DCC is selected in the PED configuration, receipt will show that, and also the conversion rate for that transaction.
Key Identifier and Passphrase: The identifier is just a name to identify the key. The Passphrase is the actual password. Click the Edit button in the Encryption Key area to edit the values. (Note: Leave the Key version at zero) 
About Dynamic Currency Conversion (DCC)
When configuring the PED settings on the Adyen web portal, you have the option of enabling Dynamic Currency Conversion (DCC). DCC is a process whereby the amount of a credit card transaction is converted to the currency of the payment card's country of issue at the point of sale. Unlike a credit card company, a DCC operator must disclose the exchange rate used for conversion at the time of the transaction. DCC services are generally provided by third-party operators in association with the merchant, and not by a card issuer. DCC enables customers to see prices in their home currency, and makes it easier for business travelers to keep track of their expenses; however, DCC will often result in a higher charge to the cardholder. Without DCC, the currency conversion is carried out by the card issuer when the transaction is charged to the card holder's statement, usually a day or two later.
Add Adyen Customization
The next step in the configuration process is to add the Adyen customization in Prism. Navigate to the Admin Console > Customizations. Click the Add New Customization button. Configure the screen with details about the customization and save the changes. Refer to the table and screenshot below.
| Field | Description |
|---|---|
| Name | Adyen |
| Version | 1.0.0 |
| Developer ID | 001 |
| Customization ID | 003 |
| Control port |
5551 |
| Manifest file location | C:\Program Files (x86)\RetailPro\PrismProxy\adyen.exe |
| Local dropdown | Local |
| Timeout | 60000 |
| Retry | The number of times the customization will try to restart if it fails.. This is a new field for customizations. The default is zero. Leave at zero unless instructed otherwise. |
| Auto Start | Enabled |
| Auto Deploy/Update | Disabled |
| Auto Stop | Enabled |
| Required | Disabled |
Sample Adyen Customization Configuration screen:

When you click the Save button, the customization is added to the list. If you need to edit the customization later, navigate to the list and click the pencil icon.

Select Adyen as the EFT Provider
Prism preferences can be configured at the Global, Subsidiary, Store, or Workstation level. Preference settings flow down from higher levels to lower levels; however, care must be taken when editing preferences to avoid having mismatches between, say, Store-level settings and Workstation-level settings. Configuration of the EFT Provider is typically done at the Store (or Subsidiary) level.
In the Admin Console, select Node Preferences > Node Selection and drill down to the desired Subsidiary, Store, or Workstation. When you have drilled down to the desired level, select Node Preferences > Transactions > EFT > EFT Server Configuration. Select Adyen in the drop-down.
You can confirm that your current workstation is using the desired EFT provider by drilling down to the workstation level and then checking Node Preferences > Transactions > EFT > EFT Server Configuration. Verify that Adyen is selected.

Edit WS Number and HAL Setting
At each workstation with a PED, go into the workstation record and make the following changes:
- Assign a WS number, if one is not already assigned
- Edit HAL settings to activate the Adyen customization
To edit workstation settings, go into the Admin Console and select Node Preferences > Node Selection. Drill down to the desired workstation. Click the pencil icon to edit the settings.
Assign a WS number
By default, Prism workstations do not have a WS Number. To save any changes to Workstation settings, like HAL Settings, the workstation must have a number.
Select the General tab.
Enter a Number to identify the workstation. The WS Number you enter must be unique for the Store.
Edit HAL Settings
Click the HAL Settings tab. Select your HAL from the dropdown.
Click the Add Customization button.
Select the Adyen customization from the dropdown and enter the path to the executable. The customization's executable is typically found in the C:\Program Files (x86)\RetailPro\PrismProxy\adyen.exe. Save the changes to the workstation record.
Sample Adyen customization added in workstation HAL Settings:

Enter details for the customization and save the changes. Refer to the table for information about the elements on the screen.
| Field | Description |
|---|---|
| Dropdown | Select the Adyen customization that you defined (in Admin Console > Customizations). |
| Port | When adding the customization in the Workstation record's HAL Settings, the Base settings should include the appropriate port for asynchronous traffic (e.g. 5552). By default, 5551 is the port number assigned to the customization for synchronous (control) traffic. Important! If you will be using multiple Prism Proxy instances, read the "Multi-Proxy Support" section of this document for information about required port configuration. |
| Path | The full path to the customizations. Customizations should go in the workstation's C:\Program Files (x86)\RetailPro\PrismProxy\ folder. |
| Disabled | Leave this checkbox cleared. |
| Required | Select the Required checkbox. |
| Text Box |
The text box has base configuration settings for the Adyen customization. This section must be included and formatted correctly (no spaces). If the base configuration settings are not entered or are entered incorrectly, the Adyen Config button will not be available on the Prism Menu. Refer to the note that follows this table for more information. |
How to Copy and Paste Base Configuration Settings
This section has information about copying and pasting the base configuration settings for the Adyen customization into the text box on the HAL Settings > Customizations screen.
Here is the sample base configuration settings that you can copy:
(start copy after this line)
asyncport=5552
adyenconfig={"account":"","username":"","password":"","allowmagstripefallback":false,"allowpartialauthorizations":false,"currency":"","promptondifferentcurrency":false,"cardtype":"givex","tenderoptions":"","applicationname":"","integratorname":"","applicationid":"","server":0,"overridetenderoptions":"","overrideautomaticappname":"","displayadyendebuglog":"","pedmain":0,"webconnect":0,"webread":0,"amount":0,"tipamt":0,"type":0,"tipcur":0,"email":"","shopperref":"","recurringcontract":"","recurringcontractdetail":"","merchantref":"","orderref":"","mask":"","cardno":"","minimum":"","expmonth":"","maximum":"","expyear":""}
(end copy before this line)
If you copy the text and paste it directly into the configuration screen, the configuration will likely fail because the text contains hidden carriage returns and line breaks inserted by the program used to create the PDF. Instead you should copy the block of text and first paste it into a text editor like Notepad++. In Notepad++, the asyncport line should stay the same. Everything else, put as a single unbroken string underneath on the second line, no spaces. When the text is properly formatted in Notepad++, copy and paste the text into the Text Box element on the HAL Settings > Customizations screen.
Sample Notepad++ file showing the second line of text as a long string without spaces:

Note: Regarding "allowpartialauthorizations":false, you can change this to ‘true' (no quotes) if you so wish. Also, the "cardtype" field has been set by default to "Givex". If you are using Stored Value Solutions gift cards, set this to "svs"
Reboot the Proxy
At this point in the configuration process, you should reboot the Proxy. To reboot the Proxy, right-click the Proxy icon in the taskbar and select Exit.
Wait for the service to shut down. Launch the Proxy from the desktop shortcut.
Edit Prism Adyen Configuration screen
When Adyen is enabled and the customization is properly configured, the Prism menu in the Admin Console area has an Adyen Configuration button. This button is only displayed when accessing the Prism menu from the Admin Console. If you don't have a base configuration, you will get an error upon entering the Adyen Menu.

Adyen Configuration Screen

The Adyen Configuration screen is divided into the following sections:
- PED Settings
- Encryption
- Logging
Refer to the following tables for details.
PED Settings
These settings are applied to the Personal Engagement Device, e.g. the Verifone M400
| Field | Description |
|---|---|
| IP Address | When you connect the PED to the LAN, the DHCP server will assign an IP Address to the device. Find the device's assigned IP Address and enter the address into the Prism Adyen Configuration screen. To find the PED IP Address, first access the menu by holding down the left-arrow key and then pressing 1, then 5, then 9. At the prompt, enter the password ‘0856', followed by the green button. You should now see the menu. Press ‘Network', ‘Overview' Press the ‘X' button to navigate back through the menu |
| Serial Number | To find the PED serial number, log in to the Adyen Web Portal. Select Point of Sale from the top menu. Navigate to Terminals. Click on your terminal to view its details. Locate the Serial number. Copy the serial number and paste it into the Serial Number field in the Adyen Configuration screen. Note: The Serial Number you enter in the Prism Adyen Configuration screen must match the Serial Number on the Adyen Web Portal (no dashes in the number). |
| Timeout | (in milliseconds) Enter the timeout for the PED, Web Connect, and/or Web-Read. The PED timeout value is especially important. It represents the number of milliseconds of inactivity in Prism that will cause the Adyen PED to time out. To prevent the Adyen PED from timing out when the user is inactive in Prism, raise this level. Default = 20000 (20 seconds) |
| Randomize Sale ID | N/A |
Encryption
When a user clicks the Take button to send the transaction to Adyen, the transaction is encrypted. The response received from Adyen is encrypted and decryption takes place on the Prism side.
| Setting | Description |
|---|---|
| Passphrase | Data sent between Prism and Adyen is encrypted. The Passphrase and Key Identifier that you enter in the Prism Adyen Configuration screen must match the values entered in the API area Adyen Web portal for the PED. To find the Passphrase and Key Identifier: Log in to the Adyen Web Portal. Select Point of Sale from the top menu. Navigate to Terminals. Click on your terminal to view its details. Click the Settings tab. Click the View decrypted properties button. On the API tab, locate the Passphrase and Key Identifier. Copy and paste the values into the Adyen Prism Configuration screen |
| Key Identifier | Enter the Key ID. Refer to the description above. |
Reload HW Config
When you save the changes to the Prism Adyen Configuration screen, you will see a blue toast message to remind you that you need to reload the hardware configuration. To reload the hardware configuration, right-click the Proxy icon in the taskbar and select "Reload HW Config" from the menu.
Adyen at POS - Credit Card
On a transaction in progress, click the Tender Transaction button.
Select Credit Card as the Tender Type.
Click the Take button.
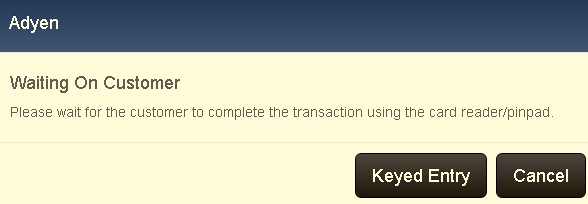
When you click the Take button, control is sent to the Adyen PED. You will see a modal in Prism that says "Waiting on Customer".

The customer then swipes the card through the PED.
When the customer swipes the card throught the PED, the payment is processed. If the transaction is approved, you will see an Approved message on the PED and control returns to Prism. The "Waiting on Customer" modal is closed and the credit card payment is listed on the tender screen. Print and update the transaction.
Keyed Credit
As explained previously, when the user clicks the Take button, the "Waiting on Customer" modal is displayed and control passes to the Adyen PED. The Waiting on Customer modal stays on the Prism POS screen until the customer swipes the card through the PED and the payment is processed. If there is a problem with the customer's card (e.g. damaged card), the Keyed Credit button on the "Waiting on Customer" modal enables you to switch to manual credit card entry.
If you click Keyed Credit, another prompt asks if the customer is present.

Yes: If you click Yes, it means the customer is present. The transaction is sent to Adyen as a MKE (Manual Keyed Entry). In this case, the Adyen device will ask for Card no, Exp date and signature.
No: If you click No, it means the customer is not present. The transaction is sent to Adyen as a MOTO (mail order-telephone order). In the case of MOTO (Card not present, customer not present), the Adyen device will ask for Card Number, Expiration Date and CVV code.
Cancel: If you click Cancel, control returns to the PED.
Regular Refunds and Deposit Refunds cannot be Voided
Regular Refunds and SO Deposit Refunds cannot be voided for Adyen.
Adyen at POS - Gift Card
Adyen supports the following types of gift card transactions:
- Activate (Sell)
- Add value
- Check balance
- Redeem
Activate (Sell) a Gift Card
In Prism 2.2.1 and later, you can activate a gift card in two different ways: 1) By listing the card as a line item on a transaction; 2) By going to the tender screen and activating the card as a tender. Prior to the 2.2.1 release, only the second method was available.
Activate Gift Cards as a Line Item
Prism 2.2.1 introduces the ability to create 'Gift Card - Prepaid' and 'Gift Card - Stored Value' inventory items. This enables retailers to sell (activate) gift cards as a line item on a transaction. Previously, activating a gift card required listing the gift cards as a tender.
To activate gift cards as a line item, you need to add one or more inventory items with the Inventory Type field set to the appropriate value: Gift Card - Prepaid or Gift Card - Stored Value.
- In the case of prepaid cards, you will typically define a separate item for each card denomination used (e.g., $20, $50, $100) and enter a Price for each.
- In the case of stored-value cards, you will typically define a single item of type Gift Card - Stored Value with a Price of 0.00. The Associate will be prompted to enter the Price (amount) of the gift card item when it is sold at POS.
Note: Both prepaid and stored-value gift cards typically have the Tax Code set to a tax-exempt code.
Sample Inventory record with Inventory Type field set to Gift Card - Stored Value:

Activate Gift Card as line item at POS
1. List a gift card item on the transaction. If prompted, enter the Price (amount) of the card.
2. Click Tender Transaction.
3. Take payment for the card.
4. Click Print Update (or Update Only). Control is sent to the Adyen PED. You will see a modal in Prism that says, "Waiting on Customer."
"Waiting on Customer" modal displayed in Prism while control is passed to Adyen PED.
5. The customer swipes the gift card through the PED. The gift card value is added to the card. Control returns to Prism. The receipt prints and a new transaction form opens.
Activate Gift Card as tenderPurchase Gift Card
Start a new transaction and click Tender Transaction
Select Gift Card in the Tender Type dropdown.
In the Take Amount field, enter the amount of the gift card being purchased.
Click the Purchase button.

When you click the Purchase button, control is sent to the Adyen PED. You will see a modal in Prism that says "Waiting on Customer".
The customer swipes the gift card through the PED. The amount you entered in the Take Amount field is added to the card.
Control returns to Prism.
Select the Tender Type the customer will use to pay for the gift card (e.g Cash).
Click Take.
Print and update the transaction.
Manual Entry/PED Keyed Entry
If a gift card is damaged and unable to be swiped, click the Keyed Entry button on the "Waiting on Customer" modal in Prism. When you click Keyed Entry, a modal for manual card entry is displayed.

There are two choices:
- The Associate types the Card No and clicks the Submit button
- The Associate clicks the PED Keyed Entry button and the customer types the number into the PED
Note: The Card Type field is automatically set to the card type set in Prism Adyen Configuration screen (SVS or Givex).
Check Gift Card Balance
There are two ways to view a gift card's balance:
Click the Options button on the transaction form and select Gift Card Balance.

Start a new transaction and click Tender Transaction. Select Gift Card as the Tender Type and then click the Balance button.
Whichever method you choose, you will see the Waiting on Customer modal. At this point, the customer swipes the gift card through the PED.
Manual Entry/PED Keyed Entry
If a gift card is damaged and unable to be swiped, click the Keyed Entry button on the "Waiting on Customer" modal in Prism. When you click Keyed Entry, a modal for manual card entry is displayed.
There are two choices:
- The Associate types the Card No and clicks the Submit button
- The Associate clicks the PED Keyed Entry button and the customer types the number into the PED
When the response is returned from Adyen, a modal in Prism shows the card's balance.
Click Print to print balance, or Cancel to return to the Prism transaction form.
Add Value to a Gift Card
In Prism 2.2.1 and later, you can add value to a gift card as a line item or as a tender.
Add Value to a Gift Card as Line Item
For Adyen, when the card is swiped through the PED at any point, it will be a pure activation request. If the card was already active, users will see a message like "refused."
Add Value to a Gift Card as Tender
On a transaction in progress, click Tender Transaction.
Select Gift Card as the tender type.
The Take Gift Card dialog is displayed.
Enter the amount being added and then click Add Value.
The Waiting for Customer prompt is displayed.
At this point, the customer swipes the gift card through the PED. The PED will show the amount added to the card.
Control switches back to Prism. The transaction form shows the Amount Due.
Select the Tender Type that will be used to pay for the valued added to the card and click Take. Print and update the transaction.
Redeem a Gift Card (Tender by Gift Card)
When redeeming a gift card, the customer uses a gift card to pay for the items being purchased.
List the items being purchased. Click Tender Transaction.
Select Gift Card as the Tender Type.
Click Take.
When you click the Take button, control is sent to the Adyen PED. You will see a modal in Prism that says "Waiting on Customer". Control switches to the PED.
Swipe the gift card through the PED.
On the PED screen, click the Take button.
When the transaction is approved, control switches back to Prism.
Print and update the transaction.
Adyen at POS - Debit Card
List the items being purchased and click Tender Transaction.
Select Debit Card as the Tender Type.
Click the Take button.
Control switches to the PED.
The customer swipes the debit card through the PED.
If the transaction is approved, you will see an approved message.
Control switches back to Prism. The tender screen shows the payment.
Click Print Update.
Keyed Credit
When tendering by debit card, the user will see the Keyed Credit button. Clicking the button indicates that the customer would like to pay by credit card instead of debit card (e.g. because the debit card is damaged).
See the Credit Card section for more information about the Keyed Credit option.
Adyen at POS - Refund by Reference (Token Returns)
Refund by Reference is a special Adyen feature that enables retailers to use the token issued by Adyen to tie a Prism transaction to the original EFT transaction. Tokenization replaces sensitive card data with unique reference numbers that retain the card's essential information without compromising its security.
When issuing a return, the merchant can select a prior credit tender to return against. This tender MUST be one of the receipts linked by returned items. If referenced, returns are enabled, and one or more viable tenders are found, the user will be presented either with a prompt asking if they wish to do a refund by reference or a list of the tenders that qualify, allowing them to pick one.
Refund by Reference shows "Undefined" Card Type
When doing a refund by reference, the Card Type will be listed as "Undefined." The reason is that the information returned by Adyen for the transaction is a simple "approved" or "not approved" The card name, card number and other information is not returned.
Asynchronous Update that changes Refund status
It is possible in rare cases for a refund by reference to be approved but then later be updated to a failed transaction. These will be highlighted via reports in Adyen and need to be resolved via the Adyen interface rather than through Prism. If there is a problem with the transaction and it is not approved (expired cards, insufficient amount available) the merchant will be taking the responsibility to see it in the Adyen reports and correct the problem outside of Prism.
About Refund by Reference with Centrals
Refund by Reference is not available when using Centrals.
Miscellaneous Topics
This section has information about the following:
- Multi-Proxy Support
- Allow Partial Authorizations
- Adyen Document Designs
- Card Names on X/Z-Out Reports
- File List
Multi-Proxy Support
The Prism Proxy allows a Prism web client to discover and send commands to hardware devices (e.g. Adyen device, printer) installed on a workstation that is connected to the Prism server. For example, when an Associate using an iPad wants to print a sales receipt, the command is sent to the Prism server via the Prism Proxy. This section explains how to configure Prism so that multiple iOS devices (e.g. iPads) can connect to a single Windows machine that hosts the Proxy. If you don't use this configuration, each iPad would need to connect to a separate Windows workstation with the Proxy installed. This applies also to servers that have multiple proxies installed, not just iPADs.
1. Determine how many iOS devices will need to connect to the workstation where the Proxy is installed. Each iOS device requires its own instance of the Proxy, running on a separate port. During installation of the Prism Proxy, specify how many instances of the Proxy should be installed and on what ports. When connecting to the Proxy, each iOS device uses a different port number from the range to connect.
2. Edit the Adyen configuration file (Adyen.ini) to include a list of ports instead of a single port. Update the Adyen.ini file with new KEY names i.e., IPPort(old) with IPPortList(new) and AsyncPort(old) with AsyncPortList(new).
Here's an example of the relevant section of the Adyen.ini configuration file.
[Customization]
IPAddress=127.0.0.1
IPPortList=5551,5553
AsyncPortList=5552,5554
The comma separated lists represent the respective synchronous and asynchronous listener ports for each proxy to be connected to the Adyen customization. The above example will allow two proxies to use the Adyen customization with two different Adyen devices. The first device will receive synchronous transaction commands on port 5551 and asynchronous cancellation commands on port 5552; the second device will do the same on ports 5553 and 5554. The configuration requires that both port lists (IPPortList and AsyncPortList) have the same number of ports. If not, a configuration exception will be raised. For a fresh install, you must configure HAL Settings in the Admin Console to indicate the appropriate Proxy to which the client will be connecting. For an over the top install, use the Adyen Configuration button on the Prism Side Menu.
Refund by Reference
Refund by Reference is a special Adyen feature that enables retailers to use the token issued by Adyen to tie a Prism transaction to the original EFT transaction. Tokenization replaces sensitive card data with unique reference numbers that retain the card's essential information without compromising its security.
When issuing a return, the merchant can select a prior credit tender to return against. This tender MUST be one of the receipts linked by returned items. If referenced returns are enabled, and one or more viable tenders are found, the user will be presented either with a prompt asking if they wish to do a refund by reference or a list of the tenders that qualify, allowing them to pick one.
Refund by Reference shows "Undefined" Card Type
When doing a refund by reference, the Card Type will be listed as "Undefined." The reason is that the information returned by Adyen for the transaction is a simple "approved" or "not approved" The card name, card number and other information is not returned.
Asynchronous Update that changes Refund status
It is possible in rare cases for a refund by reference to be approved but then later be updated to a failed transaction. These will be highlighted via reports in Adyen and need to be resolved via the Adyen interface rather than through Prism. If there is a problem with the transaction and it is not approved (expired cards, insufficient amount available) the merchant will be taking the responsibility to see it in the Adyen reports and correct the problem outside of Prism.
Allow Partial Authorizations
When you save the Prism Adyen configuration settings, this configuration is saved in the Workstation HAL's Adyen instance of the Adyen customization. This is also where you would make changes to e.g. certain Ayden parameters that need to be sent with any transaction. One of these settings you might want to change is ‘Partial authorizations'. Partial Authorizations happen when the processor authorizes less than the total amount requested or due (e.g. request authorization for a $100 transaction, but the processor only authorizes $50 (with the other $50 to be paid with a different tender). Without allowing partial authorizations enabled, the transaction would get declined. By default, partial authorizations are disabled for Adyen. To enable partial authorizations, you must edit the HAL Settings for the workstation.
Go to Admin Console>Node Preferences, Node selection and drill all the way to your workstation/proxy. Click the Pencil to edit your workstation/Proxy, and go to the HAL Settings. Select your Workstation/Proxy, and click on Customizations.
Click on the Pencil behind the Adyen Customization. You can see that the bottom of the screen has been populated with all the settings for the Adyen customization See below)
As you scroll through all the settings, you'll come to a section that looks like below,
You'll see the specific setting for "allowpartialauthorizations":false. Change that to ‘true, and save.
Do not change other parameters unless instructed to do so.

Refund Deposit via EFT (Credit or Gift Card)
When closing an order, users can return deposit amounts to EFT tenders (credit or gift card).
Notes:
- This feature does not check if the card to which the refund is made is the same card used for the deposit.
- Keyed entry is disabled when refunding a deposit to a card. Card information must be entered by swiping the card.
Configure Tender Requirements Preferences
Navigate to Admin Console > Node Preferences > Transactions > Tenders > Tender Requirements. For the Credit Card and/or Gift Card tenders, select BOTH:
The checkbox for "Return"
The checkbox for "Deposit Refund."
Save the changes.
When preferences are configured to allow deposit refunds by card and a user tries to close an order that has deposits, a modal is displayed for selecting the desired tender for the deposit return.
Select Credit Card or Gift Card in the Tender Type dropdown, enter card information and click Give.
The tender is added to the transaction. Click OK to complete the deposit refund.
Adyen Document Designs
Prism Document Designer includes special designs for Adyen Declined Receipts in both 40-column and 8x11 format. To view or edit the Adyen Declined Receipts designs, launch DocumentDesigner.exe from the C:\Program Files (x86)\RetailPro\DocumentDesigner folder. Select Adyen EFT Information in the Area dropdown. In the Document dropdown, select Adyen Declined Receipt 40col or Adyen Declined Receipt 8x11.
In Doc Designer, the design is one long design that has three sections:
- Customer Copy
- Merchant Copy
- Cardholder Copy
Z-Out Reports and Card Names
When running Z-Out reports, expect to see multiple card names and some of the card names may not be the ones you are used to seeing. Prism has no control over Card Types and Card Names that are returned from Adyen. You may not actually see the card names until you run a Z-Out. On the Z-Out, each card type is broken out and this is where you will find unexpected card names/types. The Card Name table in Prism preferences (Local Preferences > Point of Sale > Tenders > Credit Card) does not allow you to customize the card names that will show up on transactions and Z-Out reports.
Plugin-specific Log Settings
Users can set logging levels for individual plugins via the Prism Proxy "right-click" configuration settings.
The Configuration Settings screen has separate tabs for the Prism plugins that are installed with Proxy. To access the settings, start the Proxy, then right-click on the proxy icon and select Configure

Select the tab for the BandSCardService plugin and update the Log Level and any other log settings as needed. Settings configured for an individual plugin will override the default logging settings defined in PrismLogging.ini, as follows:
If no setting is made for a plugin, the plugin's log settings default to the settings made for Proxy.
The Proxy log settings themselves, as displayed in this UI, default to the "Global" settings in PrismLogging.ini until they are manually changed to different settings.

File List
In the …\ProgramData\RetailPro\Server\WebClient\plugsin\EFT\adyen folder are files related to Adyen. The two primary configuration files are found in the adyen-configuration folder. These files are Adyen-configuration.html and Adyen-configuration.js
| Folder or File | Description |
|---|---|
| \adyen-configuration | This folder has the adyen-configuration.htm and adyen-configuration.js. |
| \adyen-credit-modal | This folder has credit card-related files: adyen-credit-modal.htm and adyen-credit-modal.js files. |
| \adyen-credit-refund-modal | This folder has credit card refund files: adyen-credit-refund-modal.htm and adyen-credit-refund-modal.js files. |
| \adyen-gift-modal | This folder has gift card-related files: adyen-gift-modal.htm and adyen-gift-modal.js files. |
| \adyen-signature-modal | This folder has signature capture-related files: adyen-signature-modal.htm and adyen-signature-modal.js files. |
| \Services | Service files: Adyen.service.js, AdyenConfig.service.js, AdyenCredit.service.js, AdyenData.service.js, AdyenGift.service.js |
| config.js | Configuration file |
| void.config.js | Configuration file for voids. |