Styles
Styles enable you to group inventory items that possess similar characteristics, but vary in size, color, or some other attribute. In a style, each size and color combination is a separate item. For example, a sweater sold in four sizes and two colors would comprise a style of eight items.
Styles have the following characteristics:
- A style can be made up of only one item if the item has a unique DCS Code, Vendor Code, and Description 1.
- You can view members of a style as a group in Style View.
- You can apply price and cost changes to all items in a style
Style Elements in Inventory UI
- Style Lookup/Item Lookup toggle button in Inventory. This button enables you to switch easily between working with style-level information and item-level information
- Style Details screen for adding/editing styles
- Style grid that can be pivoted to display key values for style members (e.g. OH Qty, Price, Cost, Margin).
- Grid format preferences that enable users to customize style lookup
- Functionality to create and edit grid scales
Using Description 1 or Description 2 for Style Definition
There are two things that define a style: (1)the style sid, and (2) the combination of dcs, vend code, desc1, and possibly desc2. These fields make up the style definition. Normally, Description 1 is used; however, some retailers prefer to use Description 2 (or both Description 1 and 2). You can set the Style Definition field in Admin Console > Preferences & Settings > Node Preferences > Merchandise > Inventory. When you enable the option in Node Preferences > Merchandise > Inventory, Prism automatically creates unique item style definitions using the entry in the selected Description field(s). You can assign Description 1, Description 2 or both as style definitions.
Distinguishing Items within a Style
Individual items within a style are distinguished by each item's size-attribute combination in the style grid.
New Style
Navigate to Store Operations > Merchandise > Inventory > Style Lookup.

Click the New button on the bottom menu.
Select the DCS Code and Vendor Code from the respective drop-downs.
Type the desired primary description for the style in the Description 1 field (maximum 60 characters).
Enter a Price and Cost. Upon saving, Cost and Price Adjustment Memos will be created.
Select a Scale. The grid scale is displayed with the value set to OH Qty. New style items will be created for each grid cell that has an OH Qty value. Click Create All Items to populate each cell of the grid with a zero (the OH Qty will be updated later by receiving vouchers). You can optionally type an OH Qty in the grid cells for each attribute/size combination. Upon saving, Quantity adjustment memos will be created.
When you add a new style, Prism checks if it matches an existing style (same DCS, Vendor Code, Description 1-2). If the new style matches an existing style, a dialog box informs you that the style already exists and gives options to join this item to the style or to cancel.
Entering Item-Specific Values in Style Grid
In the Inventory style grid, you can enter item-specific values for style items (Margin Amt and Margin % are read-only). Here are two examples of how this feature is used when creating a new style:
- Enter an OH Qty value in individual grid cells to create items in Inventory. A common practice is to enter zeros and then receiving vouchers will update the OH Qty of the individual style items. You can use the "Create all items" button to populate the cells with zeros or type the desired OH Qty.
- Enter a different Price (or other value) for individual cells in the grid. This enables different items within a style to have a different Price or other value when needed.
Default Values for New Style Items
New style items inherit all grid values from the primary item.
Track changes
With the Track changes checkbox selected (default=selected), when you change the value for a grid cell, upon clicking or navigating out of the field, the changed cell is highlighted in yellow.
Entering OH Qty
After selecting a grid scale for a new style, you can enter an OH Qty for the items in a new style. You can enter the OH Qty manually, or you can use the Create All Items button to enter zero as the OH Qty in each empty cell in the style grid. Prism creates new items in inventory when you save the style.
- If you enter a non-zero on-hand quantity, Prism will create the items and also create quantity adjustment memos (and prompt the user to select a Reason) when saving the new style.
- If no entry is made in a grid cell, the item is not created.
Enter the DCS Code, Vendor Code , Description 1, Price and Cost.

Add New Style in Advanced Item Lookup
You can add a new style on-the-fly in Advanced Item Lookup (except at POS). This enables users to add new styles when needed when creating back-office documents. For example, when creating a receiving voucher, a user may use Advanced Item Lookup to search for a style and, if the style is not present, add a new style on the fly so the items can be received into Inventory. Previously it was only possible to add new items (not styles) in Advanced Item Lookup.
On a non-POS document (e.g., a purchase order), click the Advanced Item Lookup button (magnifying glass icon).
By default, Item Lookup is displayed. Click the Style Lookup button on the bottom menu.
Click the New button on the bottom menu.
Enter the new style information and save. After saving the style, click Return to Document. All defined item(s) with a Doc Qty are added to the document with that quantity.

Lookup a Style
Navigate to Store Operations > Merchandise > Inventory > Style Lookup.
Select a style lookup element and operator. Enter search criteria. Click Search.

From the search results, select the desired style and click the Item Details button.
Click Edit to edit the style, if needed. When finished, save the changes. Click Item Details to return to the item details area.

Grid Scales
A grid scale is a user-defined array of sizes and attributes that you can use as a template when creating new styles. Each scale can be used for an unlimited number of styles.
For some merchandise, attributes vary from style to style, and from season to season. In this case you typically will not know what attributes you need until you order the items. As an alternative, you can define scales with sizes only. This gives you the flexibility to define specific attributes for each style while avoiding repeated manual entry of your commonly used sizes.
If you modify a scale by adding more sizes or attributes, Prism adds those sizes and attributes automatically to every style grid that was built using that scale. If you modify an individual style grid in the same manner, the original scale is not affected.
New Grid Scale
In the Style Details area, click the Scales button.

In the Scales dialog, click the Add button.

Enter a name for the scale. Click OK.

A modal for entering details for the scale is displayed. To add sizes/attributes: Click the plus sign. A blank row is displayed. Type the attribute. Click the plus sign again to add another attribute.
Add Sizes in the same manner.

Click OK when finished.
Edit a Style
When a user tries to save changes to a style item, a prompt asks if the change should apply to all items in the style or only the currently selected style item.
Sample prompt displayed when a change is made to a style item (not a style definition field):

If the change is to one of the style definition fields (DCS Code, Vendor Code, Description 1, Description 2), you can either apply the change to the entire style or remove the item from the current style and place it into a new style of its own.
Sample prompt displayed when a change is made to a style definition field for a style item:

Track changes to style grids
A checkbox labeled "Track changes" is included in the Inventory > Style View > Style Grids area. When the Track changes checkbox is selected, changes made in style grid cells are color-coded. If unchecked, all cells are shown without color-coding. This feature is especially useful for keeping track of which cells have been edited when working with styles with many sizes/attributes. The Track Changes checkbox is only editable when the user is in Style Details and in edit mode. The screenshot below shows the Track changes checkbox is selected and one of the cells has been edited, causing it to be highlighted in yellow.

Editing Attributes and Sizes
If necessary, you can edit the attributes and sizes of a style, including adding additional attributes/sizes.
In the Style Details screen, click Edit Attr/Size.
Edit the attributes and/or sizes as needed.
Click OK. Click Save.
Pivot the Style Grid
By default, style grids display sizes across the top row of the grid, and attributes in the first column of the grid. You can click the Pivot button to switch the layout and put attributes on the top row and sizes in the left column.
By default, the cells of the grid display OH Qty. You can select a different value from the drop-down (e.g. Price or Cost).

Item-Specific Values in Style Grid
(Prism 2.2.1 and later) In the Inventory style grid, you can enter item-specific values for style items. Here are two examples of how this feature is used when creating a new style:
Enter OH Qty (i.e., zeros) in individual grid cells to create items in Inventory. When you save the stye, cells with a value will show as "created items."
Enter a different Price (or other value) for individual cells in the grid. This enables different items within a style to have different Price or other value when needed.
Previously, any changes made within the style grid applied to all items in the style. New items inherit all grid values from the primary item, except the fields entered to create the item. Margin Amt and Margin % are read-only.
Track changes
With the Track changes checkbox selected (default=selected), when you change the value for a grid cell, upon clicking or navigating out of the field, the changed cell is highlighted in yellow.
Field entry for one style item updates that field for other style items
(Prism 2.2.1 and later) When users make an entry in Style Details for UDF, AUXs, Text 1-10, Long Description, Height, Width, Length, Sellable Date, SPIF, Description 1-4 and Trade Disc % fields for any item in the style, Prism updates the corresponding fields for the other items in the style. This saves users from having to manually update each item in a style.
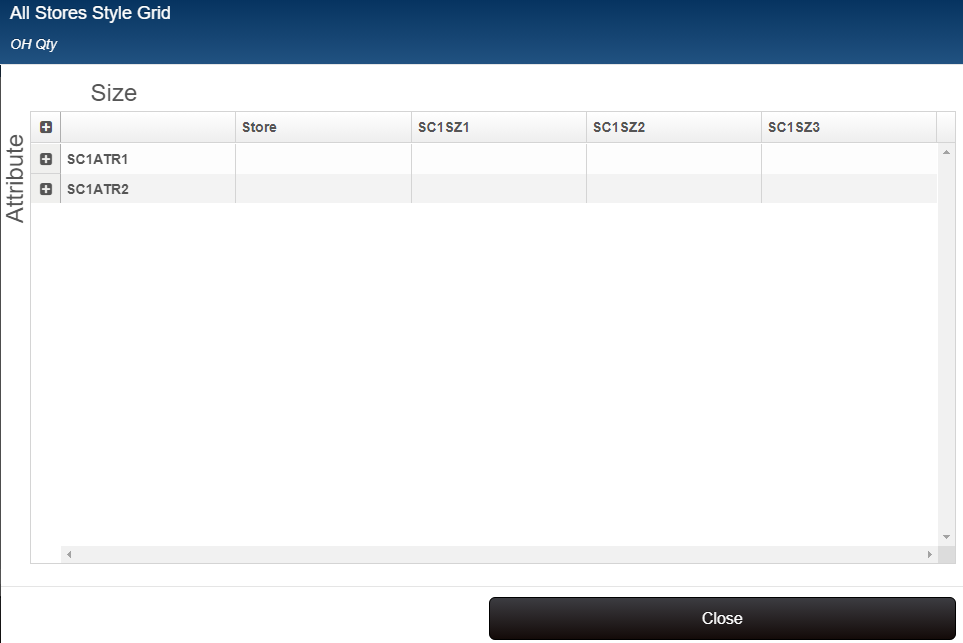
See all stores in Style Details
When viewing Inventory Style Details, click the Show All Stores button in the grid footer on the OH QTY tab to see quantities at other stores. To view OH quantities at different stores in style view, you previously had to click the dropdown to select each store and could view only that store. This makes it easier to compare quantities at stores.
Clicking the Show All Stores button opens a modal that displays all of the Subsidiary's stores and their quantities. The grid rows are grouped by the attribute or size name, depending on which one is shown along the left. You can expand any of these row groups to see each stores' OH qty values.